Have A Magical Day Tutorial - Stephanie Donnini

Uniquely Creative Products Used:
UC1855 Unicorn Magic Stamps, UCD1974 Unicorn Magic Dies, UCD1999 Scene Builder #1 Die, Foam Mounts
Other Products Used:
Smooth White Cardstock, Stamping Platform, Die-Cutting Machine, Glue, Blending Brush, Iridescent Sequins, White Glitter Cardstock.
Inks:
Altenew Volcano Lake, Altenew Pink Pearl
Distress Ink Shaded Lilac.
Copic Markers: R85, R83, R81, BG49, BG45, BG11, V15, V01, V000, W1, W00, Y19, Y21, YG17, YG03, YR68
Instructions:
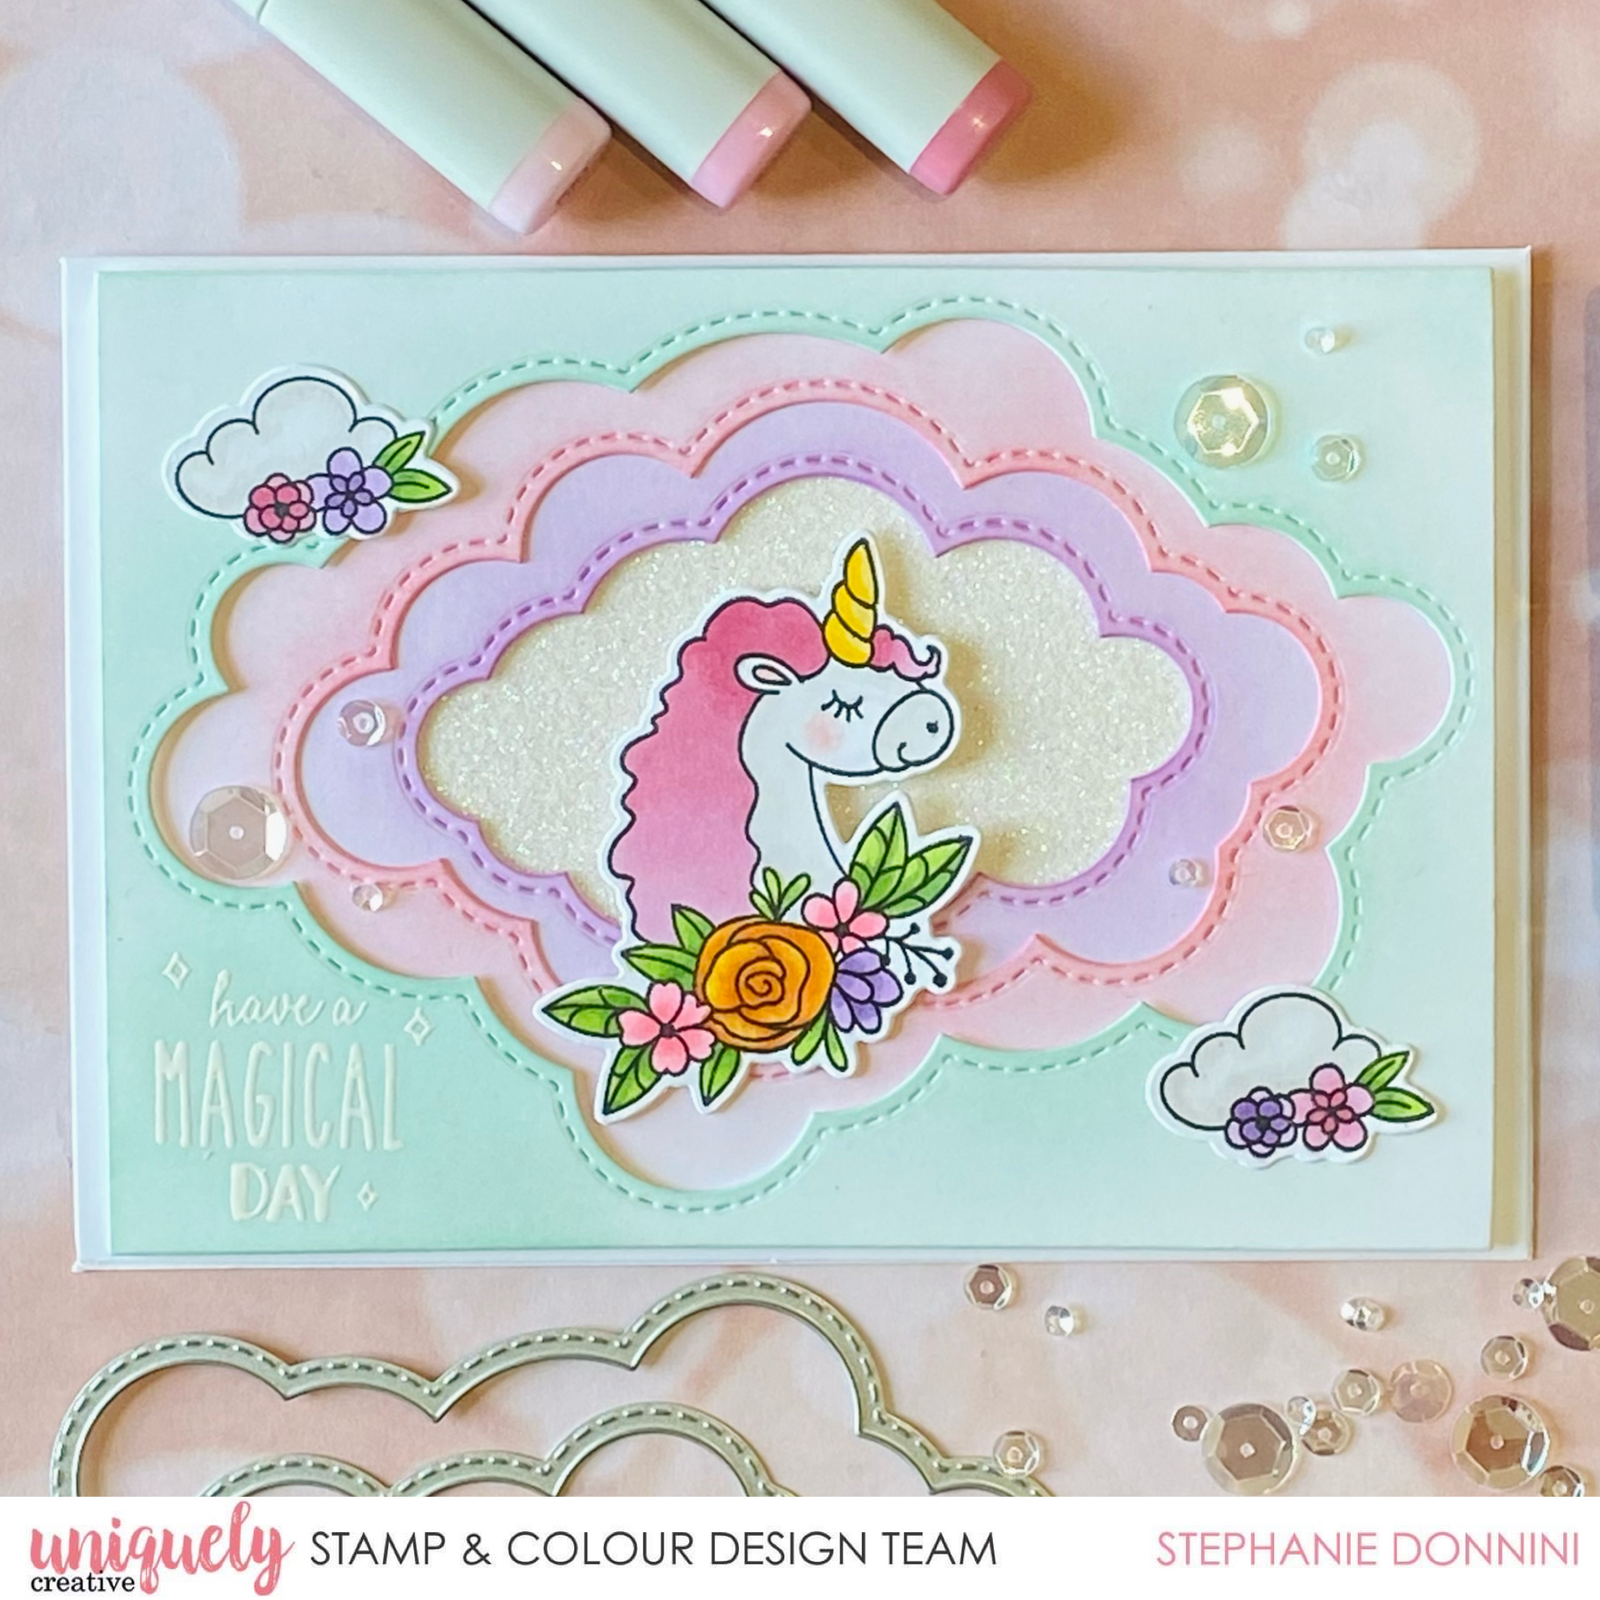
1. Stamp ‘Unicorn Magic’ images on white blending card using copic friendly black ink. Colour images with copic markers, then cut out using the co-ordinating dies.

2. Die cut each cloud from the Scene Builder #1 Die set. Stephanie used 3 pieces of A6 smooth white cardstock.

3. Blend a different colour of ink on each panel.

4. Take the top cloud panel and cover the area you want the sentiment to go with anti-static powder. Stamp sentiment with VersaMark ink, then sprinkle over white embossing powder. Heat with a heat tool till melted.

5. Stephanie applied foam tape behind the top cloud panel, then adhered all the clouds panels to some white glitter cardstock. The Unicorn Magic images were adhered with foam mounts, and iridescent sequins were added as a final touch.
