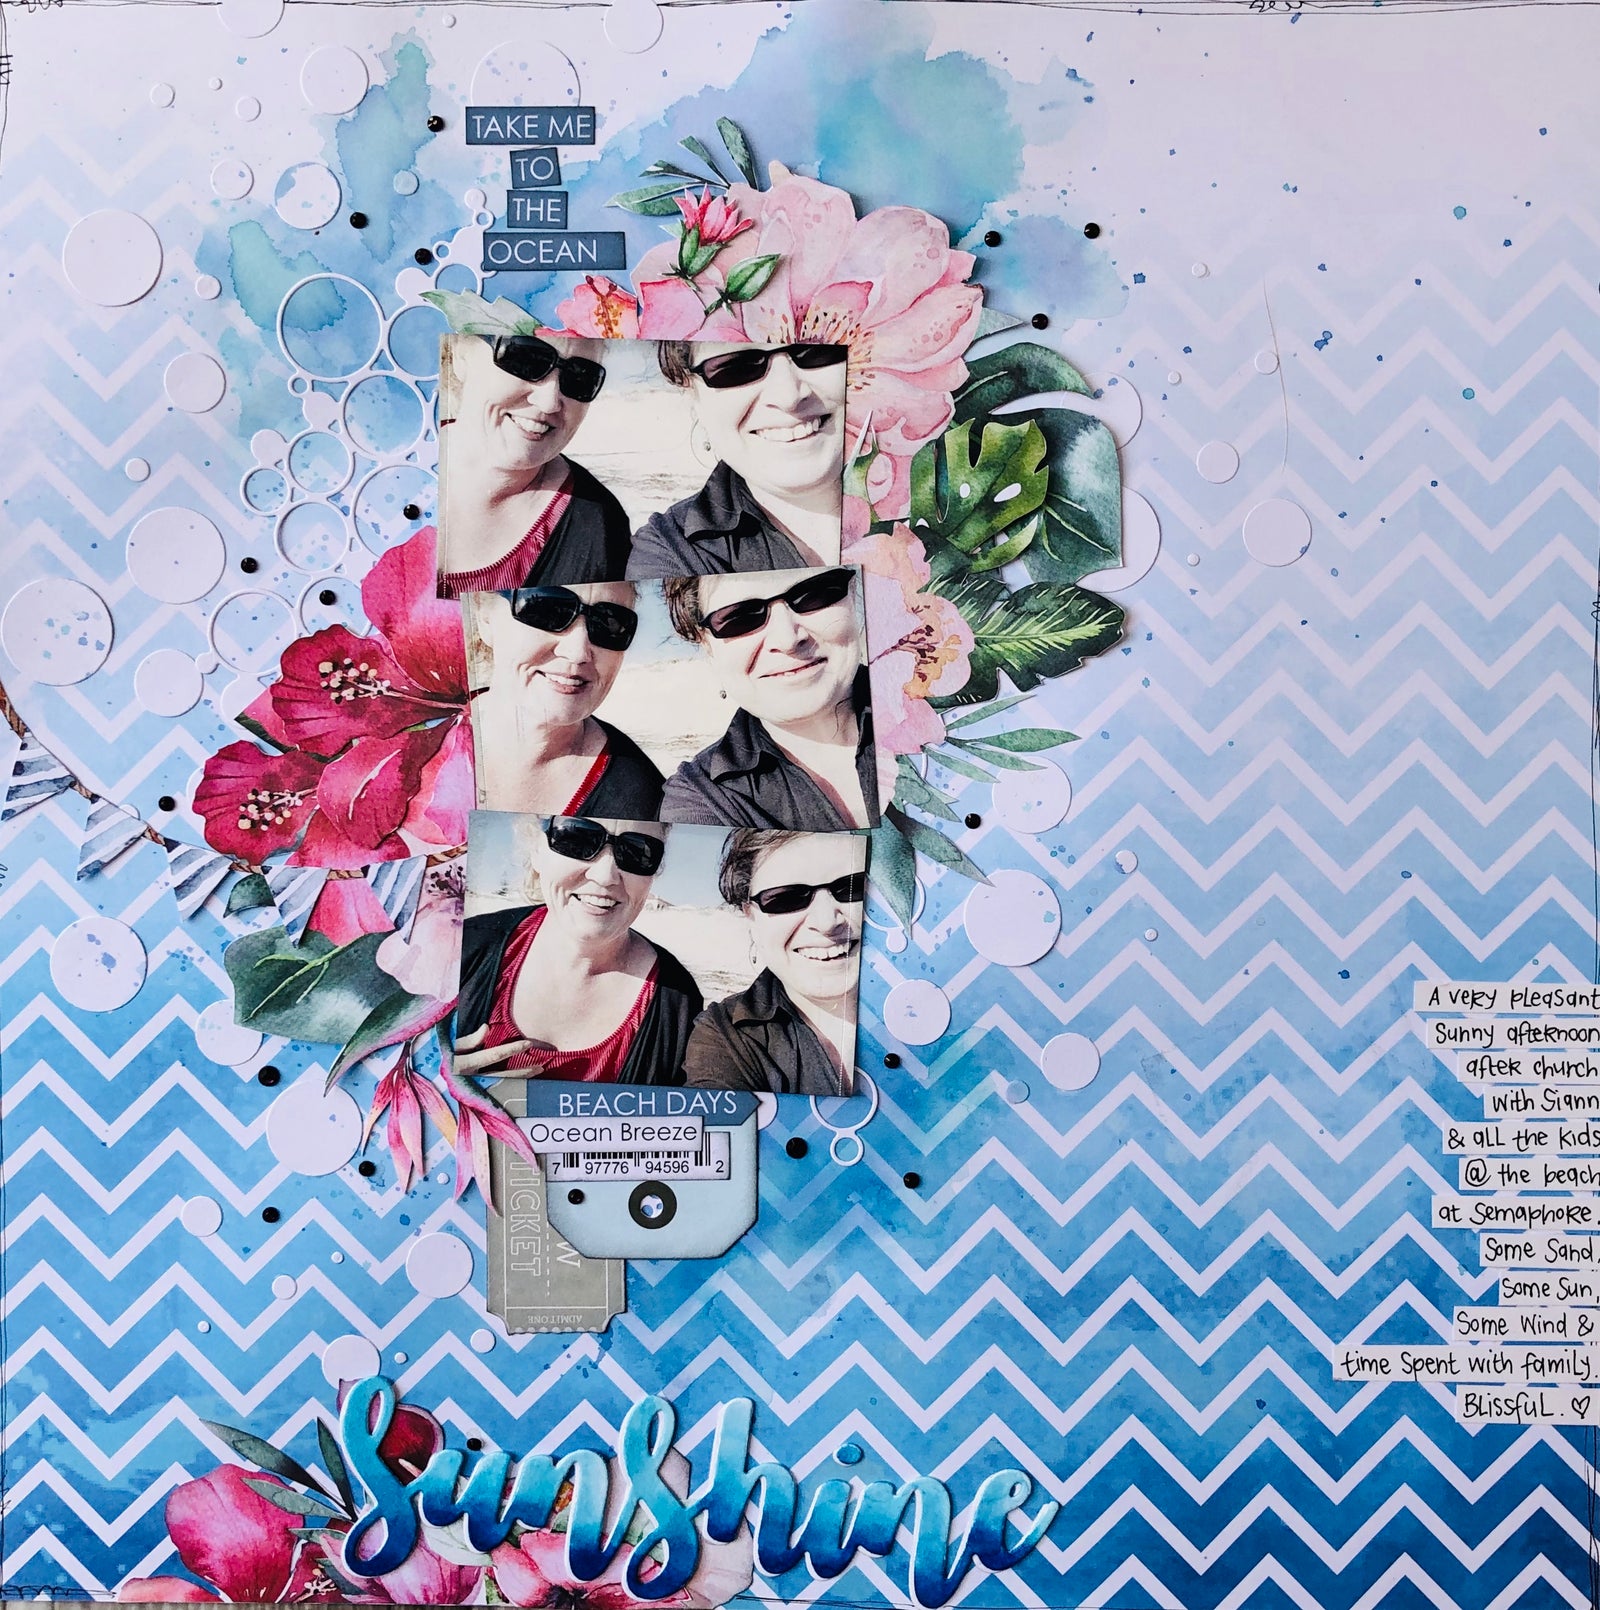
Sunshine Tropical Dreams - Lydell Quin

Uniquely Creative Products Used
Tropical Dreams Creative Kit (February 2020) Find it HERE
Scripty Sunshine Die (or any title word die you might have that suits) Find it HERE
Other Products Used
Tim Holtz Distress Ink, black Sharpie marker
Step 1
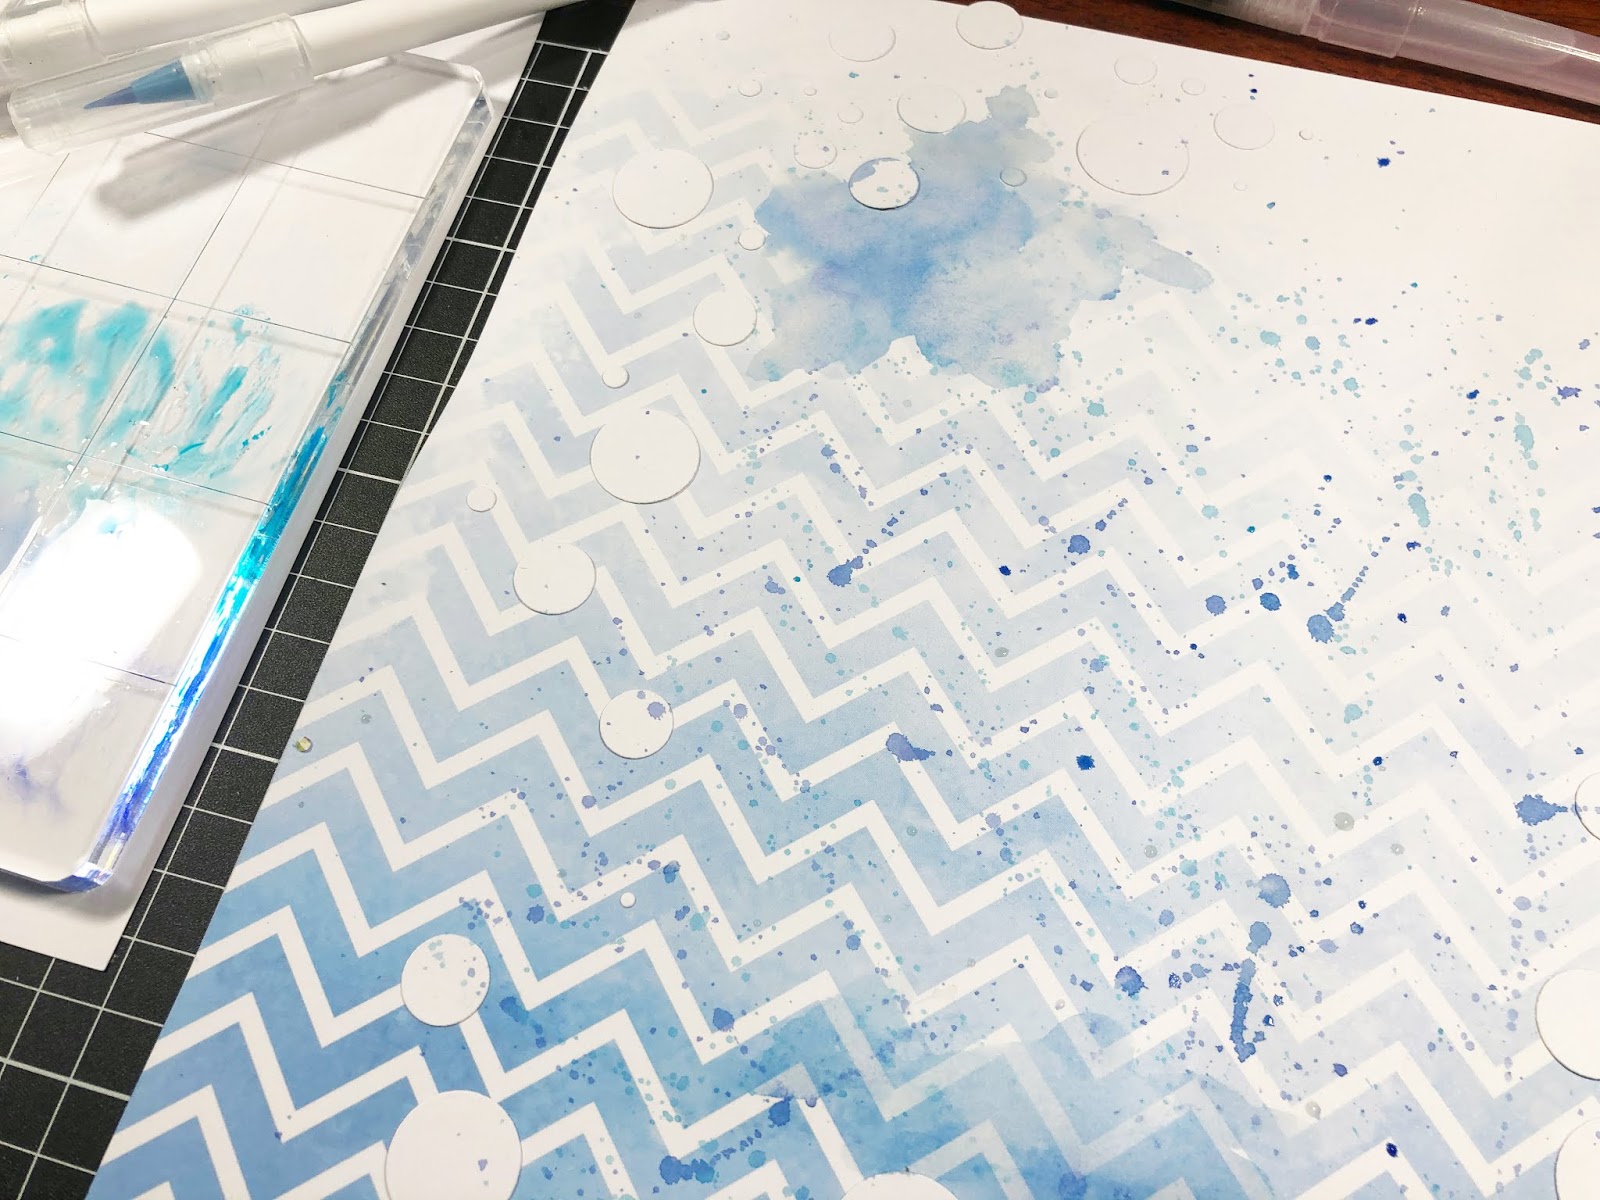
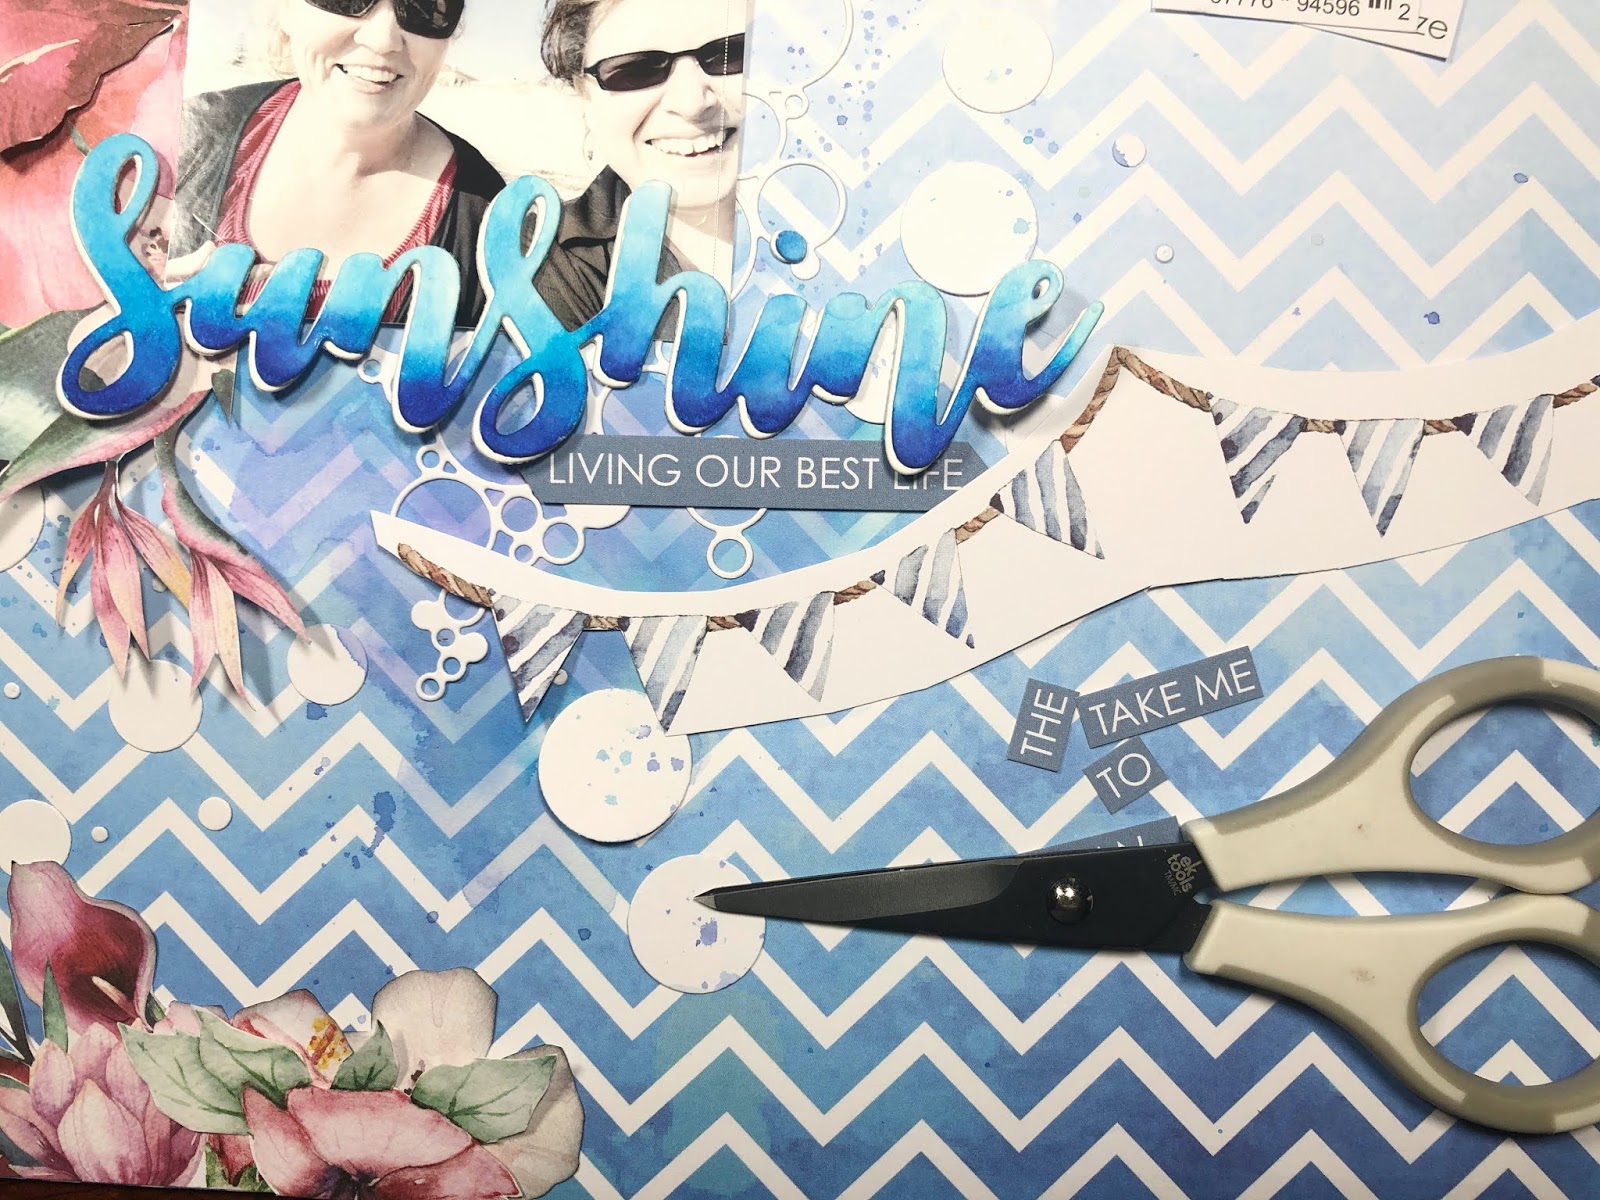
Select paper UCP2025 (Tropical).
Using your UNIQOLOUR Markers scribble on the blending block and pick up with a wet brush. Smoosh and splatter the paper with a couple of colours (I used shades of blues) and let dry or heat with a heat tool. Keep your placement of ink just around where you envision your photos might sit.
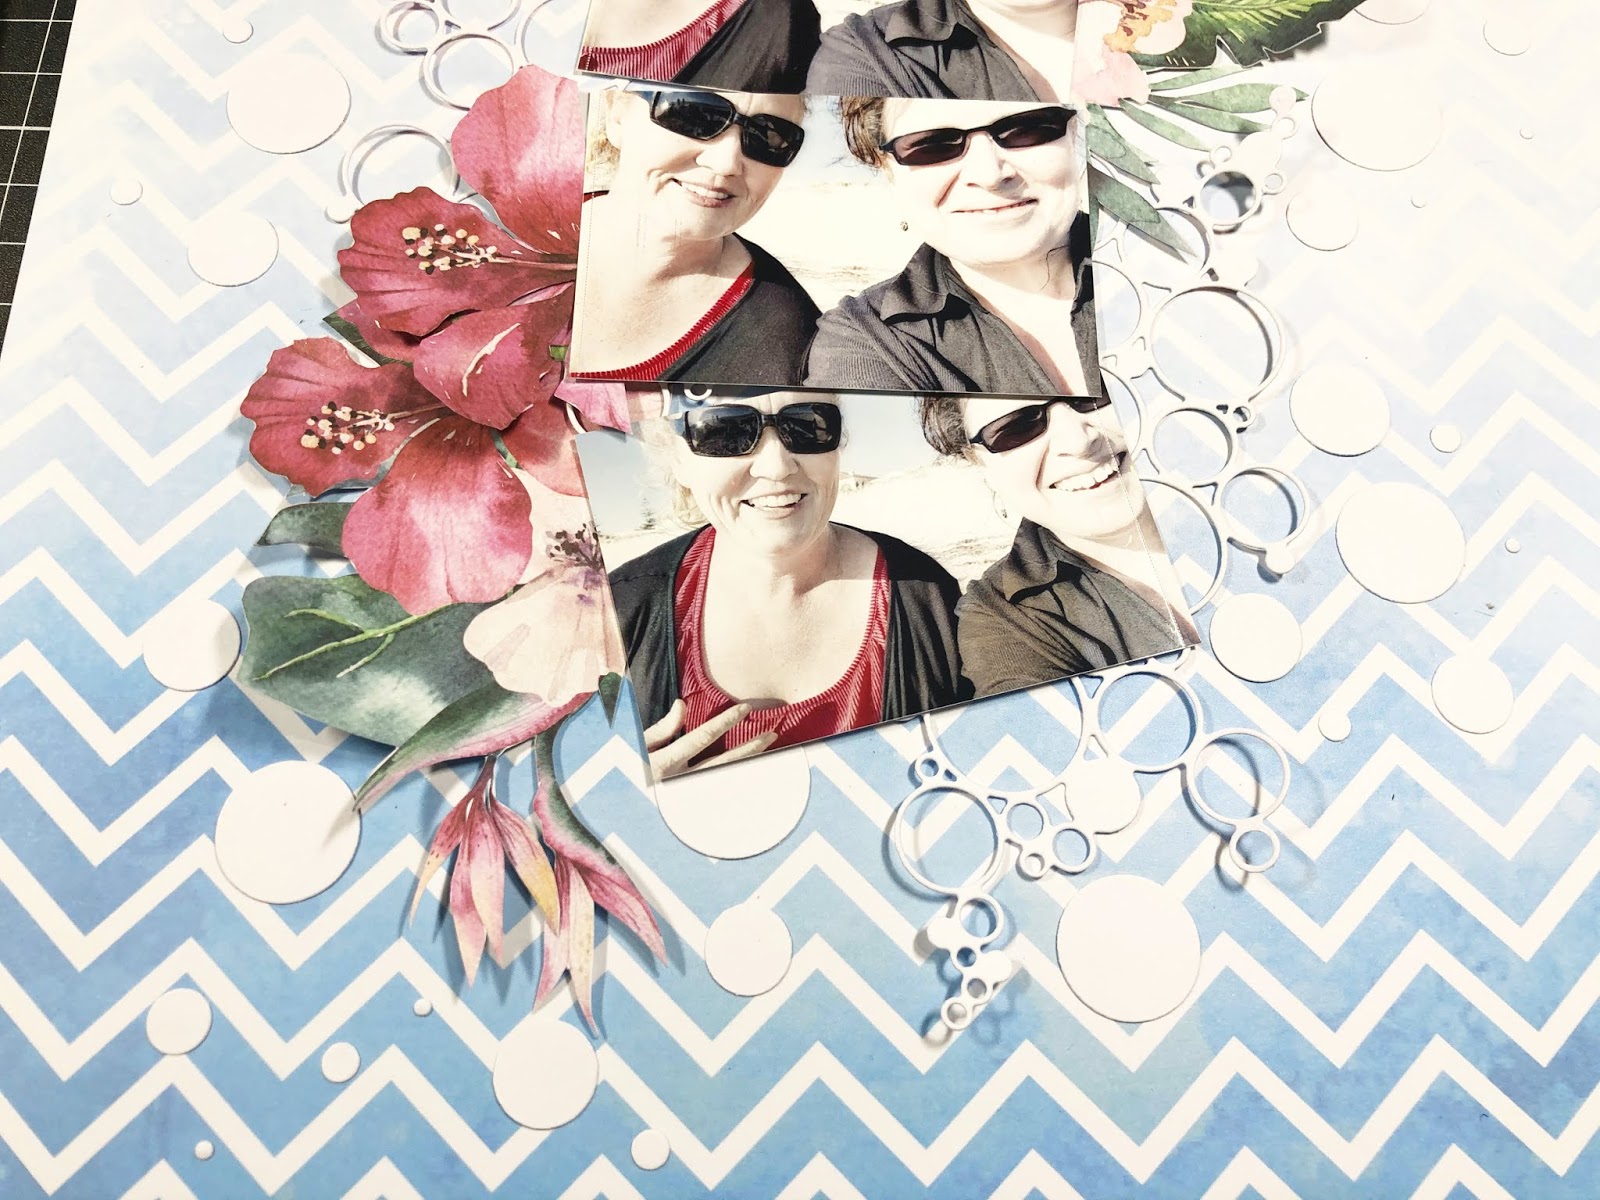
Step 2
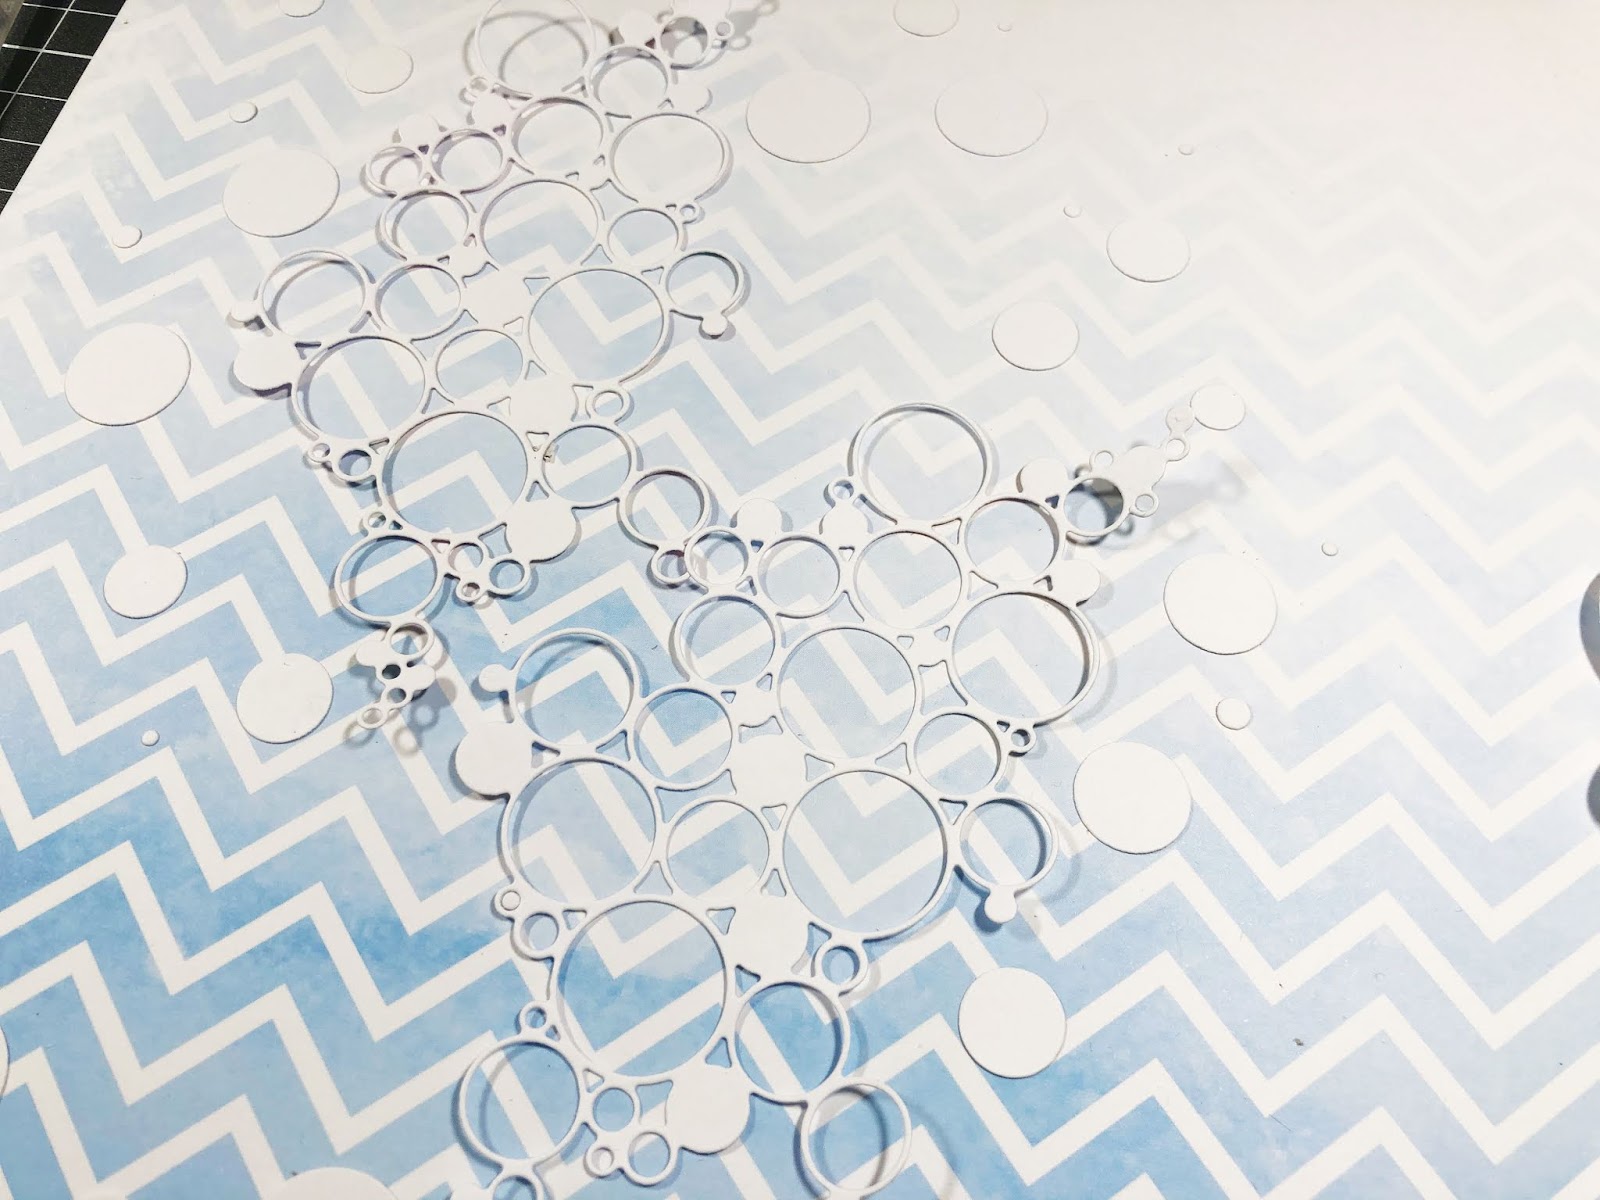
Die cut the circles using the 'Bubbles Texture Die' and the reverse side of the Paper Collection Pack cover sheet. Cut 2 and preserve the circles that pop out of the die to use as extra background elements.
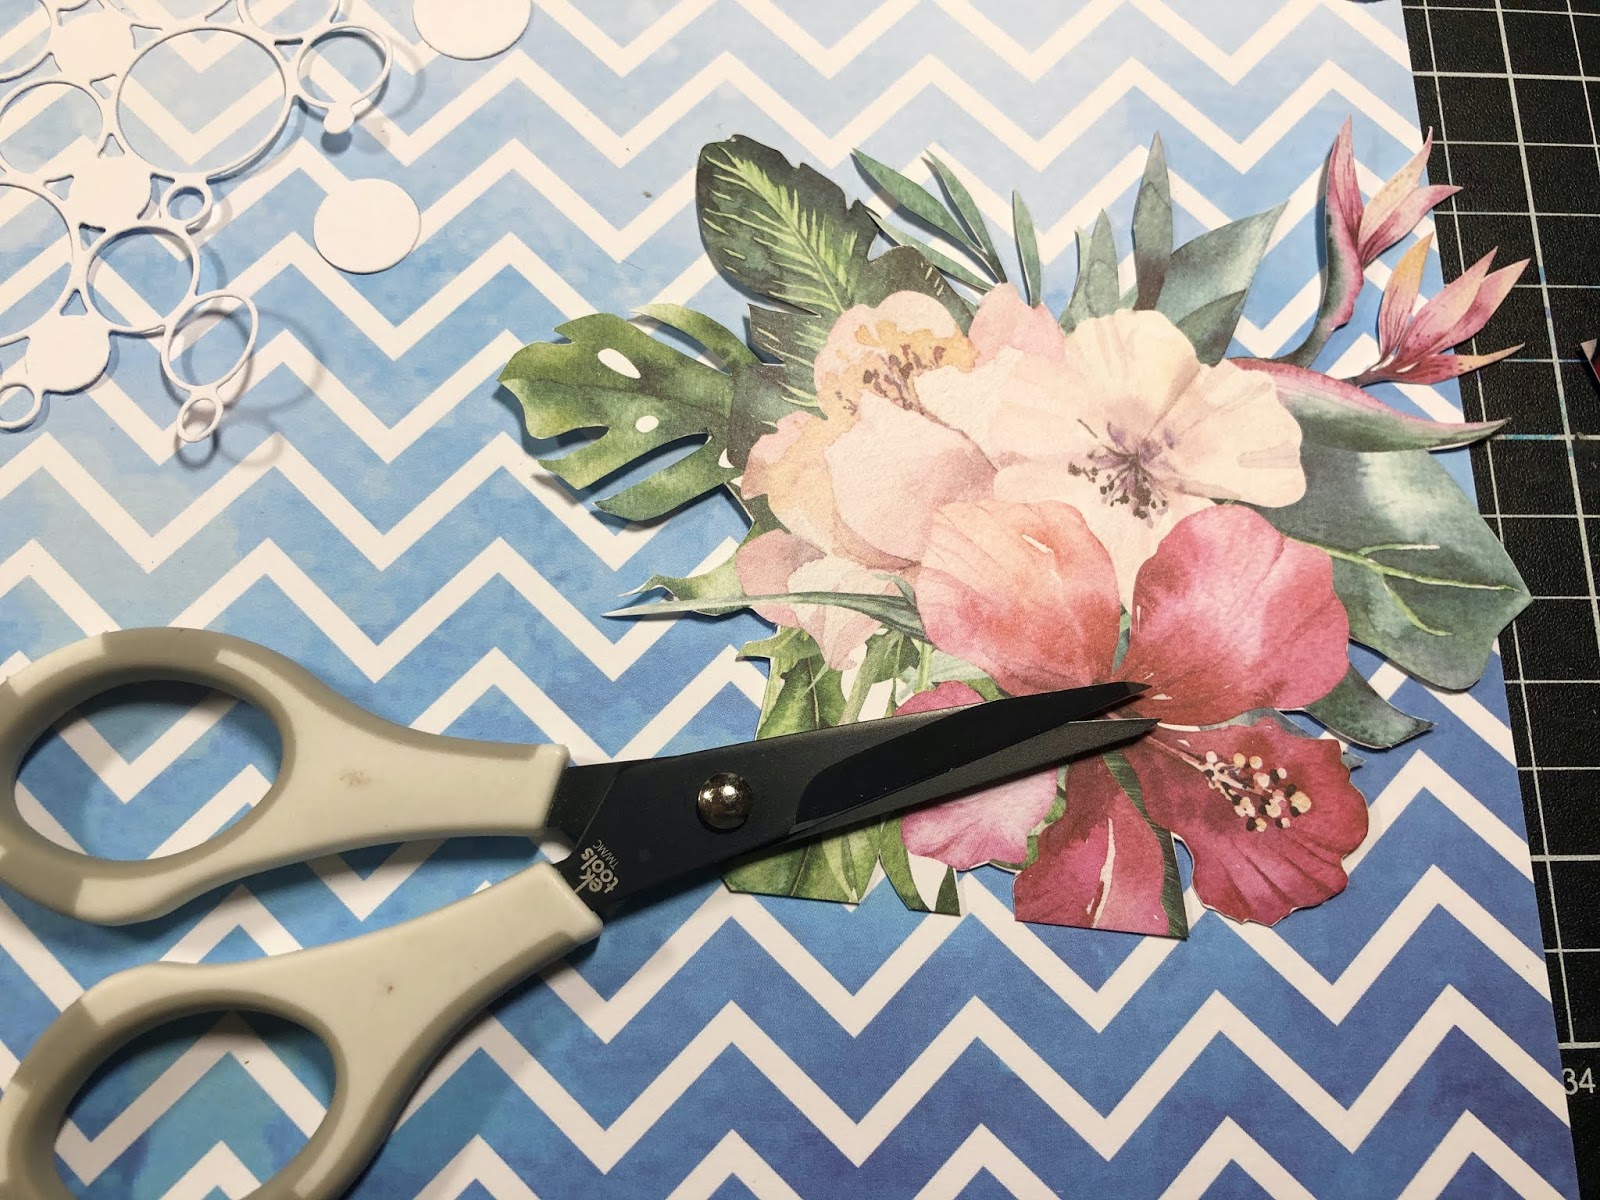
Step 3
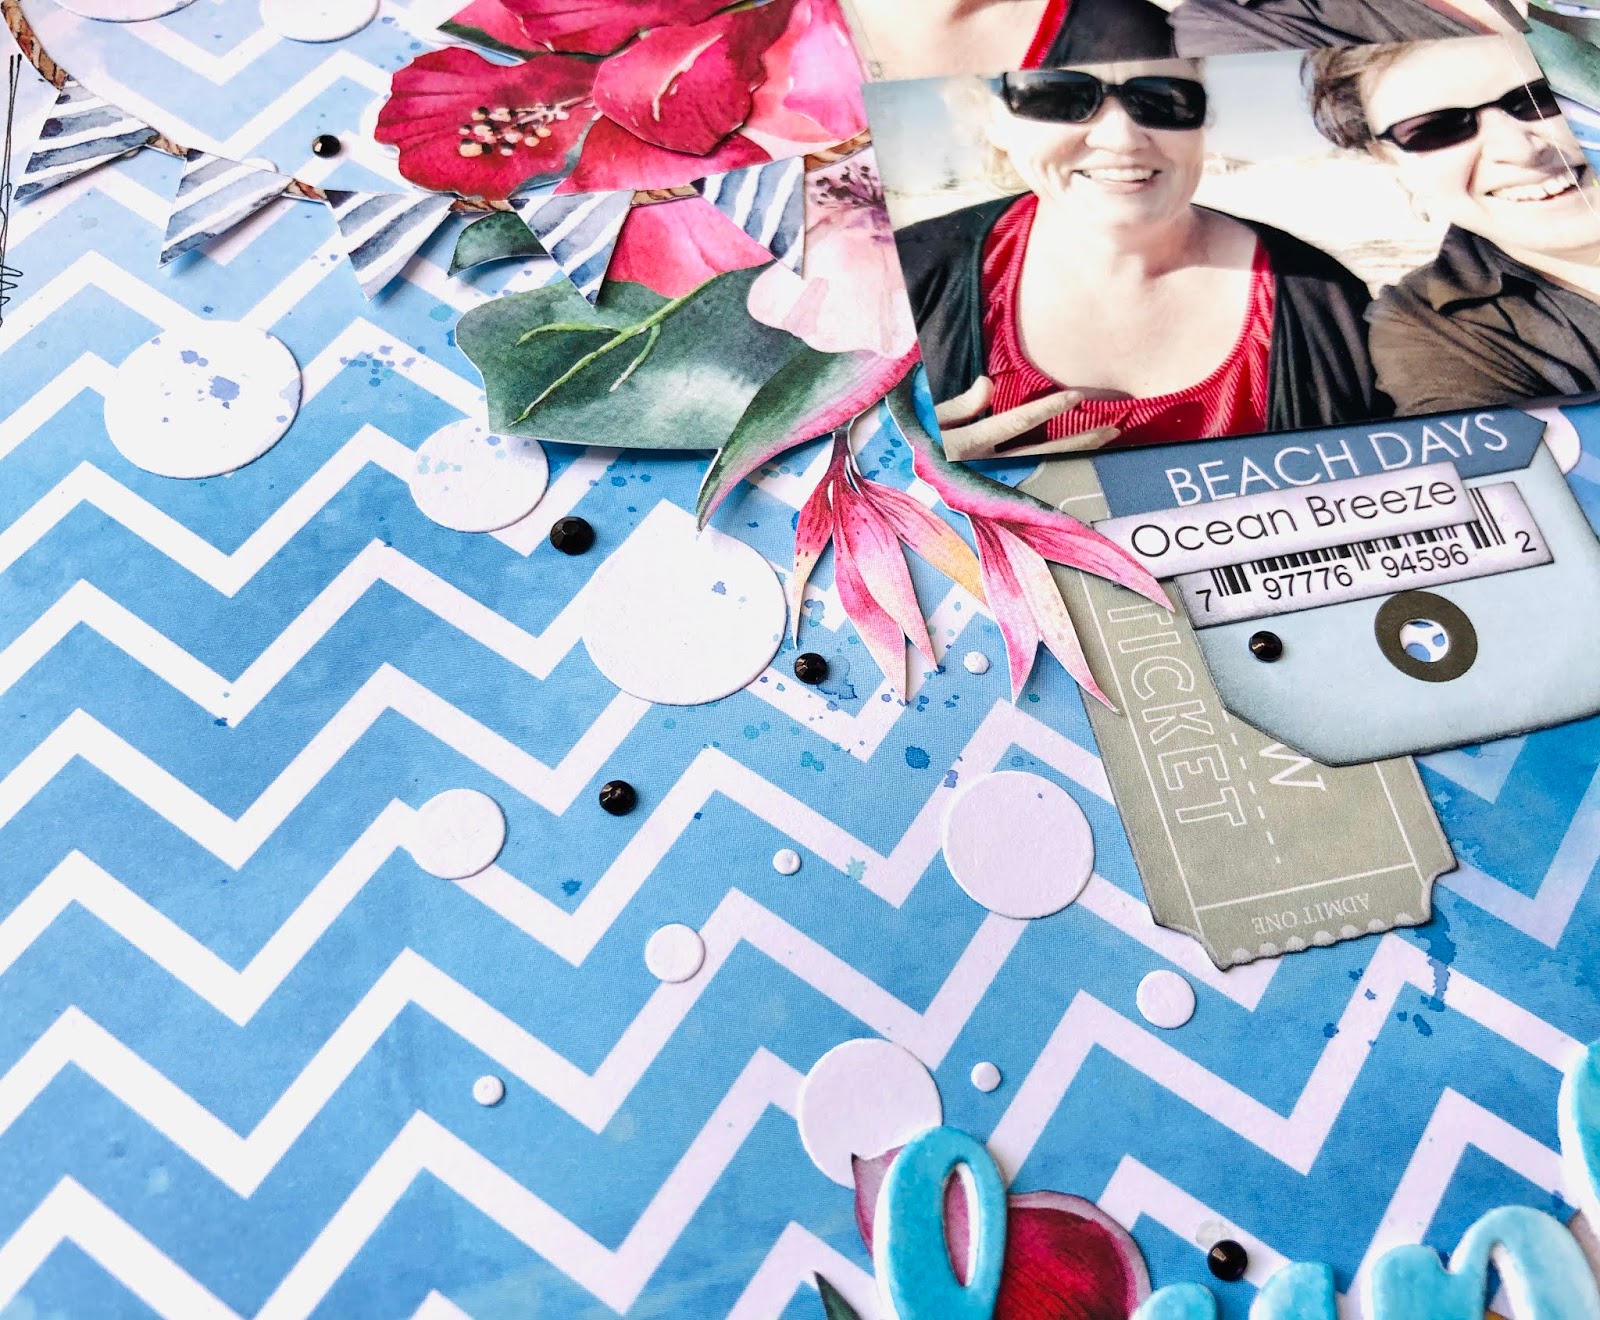
Using Paper UCP2021 Paradise, select a floral arrangement and fussy cut using fine tipped scissors or a scalpel blade. Trim as needed to fit behind photos. You might want to lay out your elements with your photos for placement at this stage.
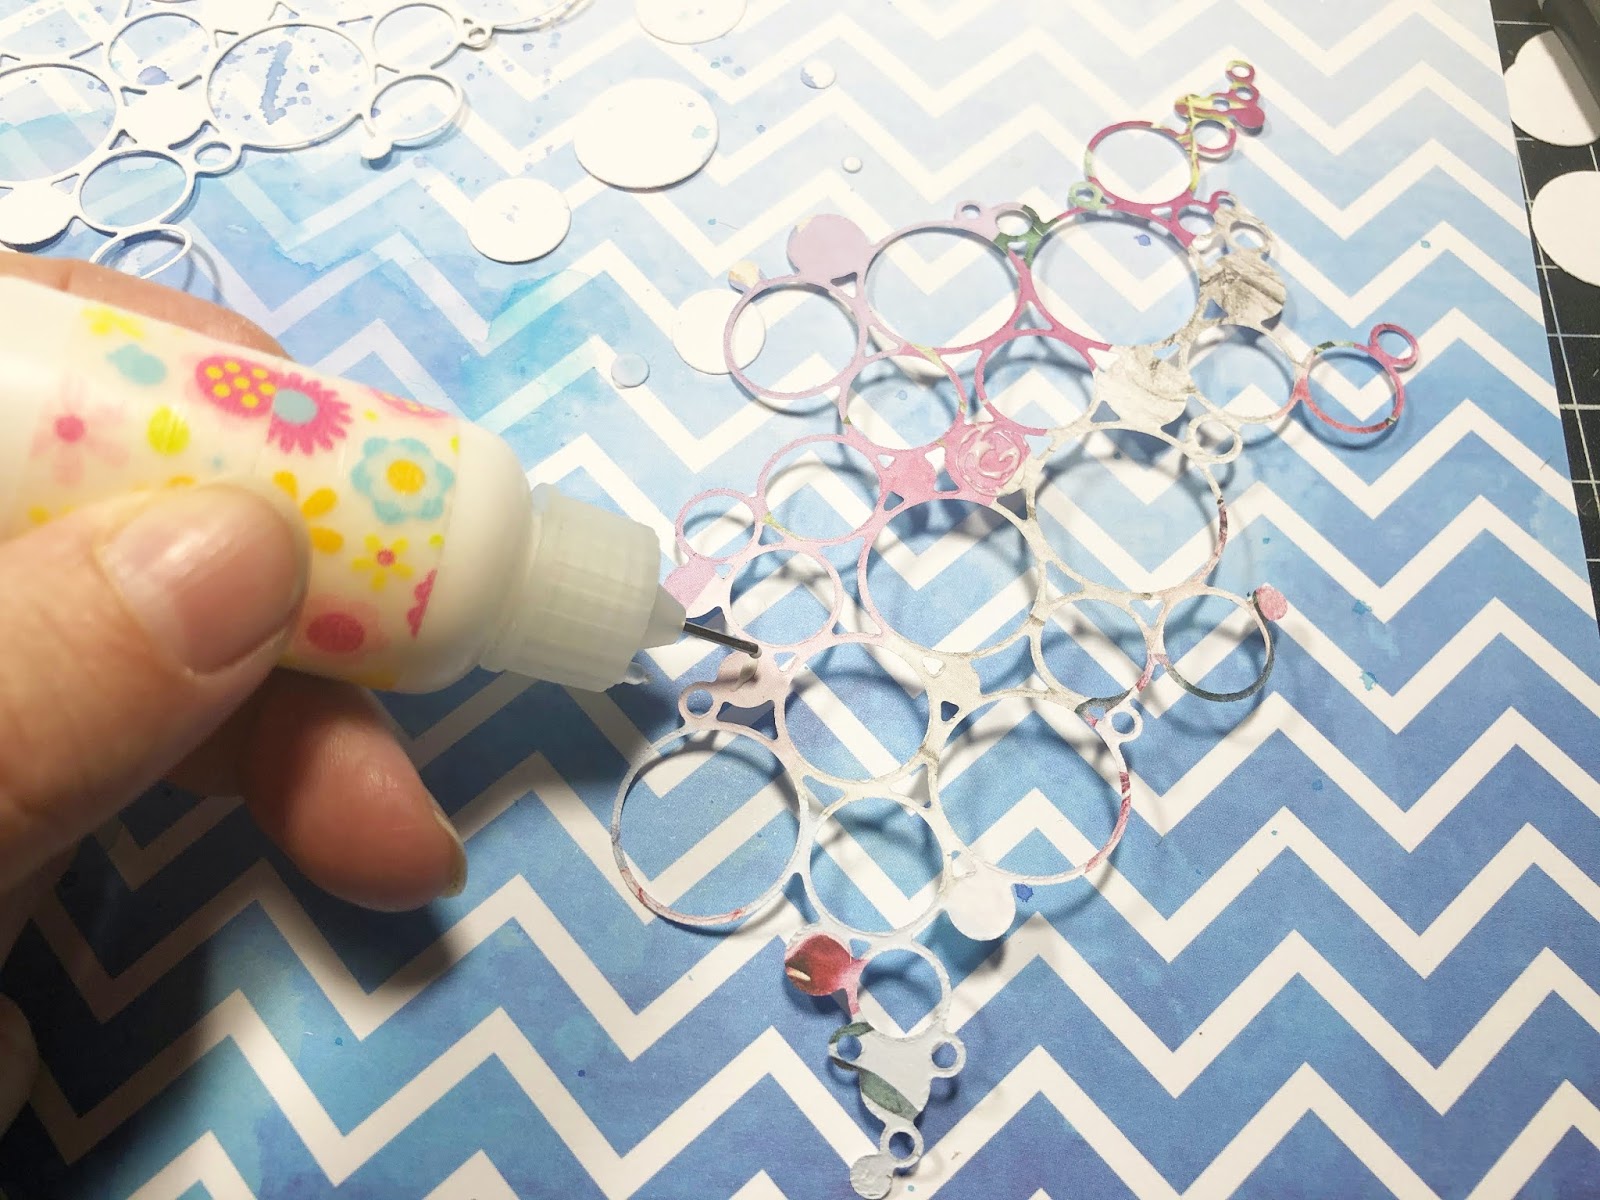
Step 4
Once you know where elements need to sit, use a glue with a fine nozzle to add adhesive to the back of the Bubble Texture die cuts and press down in place. (I found this bottle with the fine metal nozzle which is perfect for gluing fine detail die cuts. I just keep refilling it with a nice thin white glue that dries clear.)
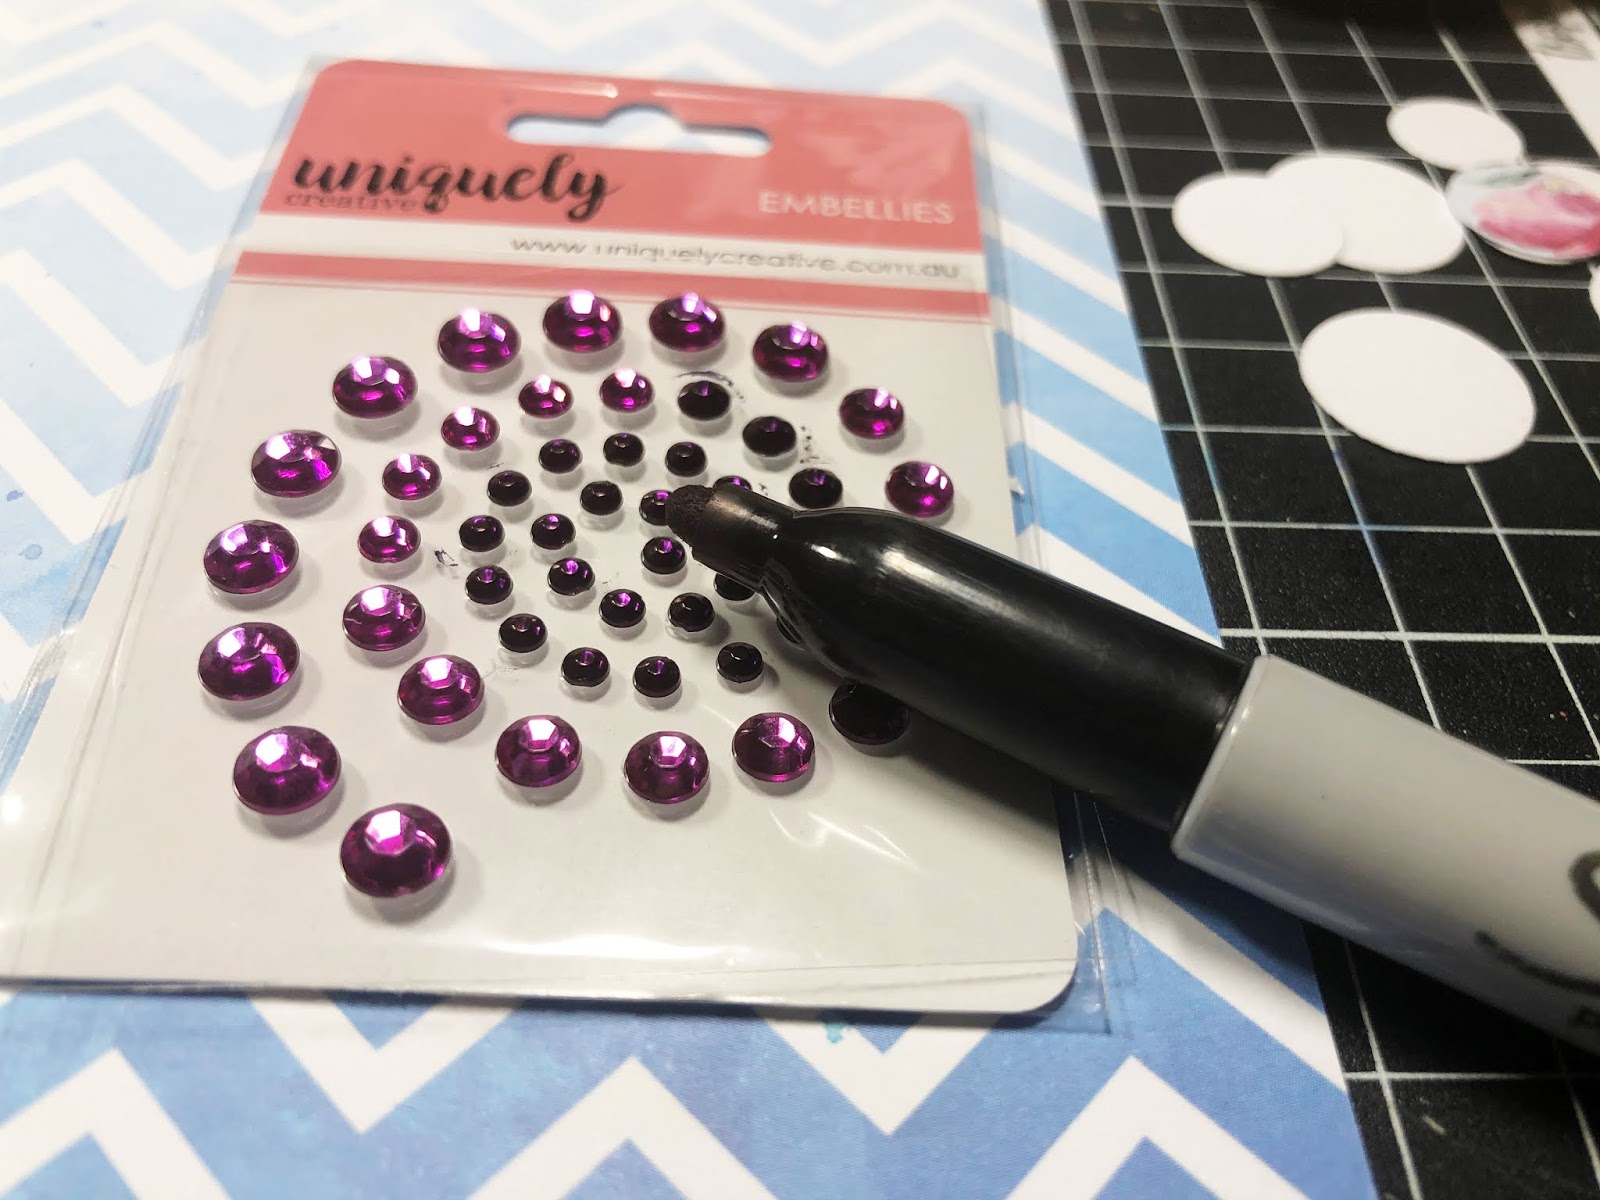
Step 5
I wanted to change the colour of the Violet Pearls that came in the kit, so I just coloured them with a black Sharpie marker. Just let dry for a few minutes before touching them.
Step 6
Die cut the title using any word die from the Watercolour Card. Cutting the die twice will give you a thicker title and you can offset the white piece underneath to create a white shadow effect when gluing them together. Glue the words together after colouring.
To Colour
Scribble the blue and purple (from last month's kit) on your blending block. and spray with a touch of water. Pre-dampen your die cut piece. Starting at the bottom, add the darkest blue and blend out with your brush to be lighter at the top of the letters. While still wet, pick up a little purple and touch it right on the bottom of each letter to deepen the shade of blue. Do one letter at a time and be sure to keep the watercolour cardstock damp before starting each letter to make the blending process easier!
Once dried completely glue your two die cut words together, off setting the bottom white piece to create the simple shadow effect I mentioned earlier.
Step 7
Using the reference photo, pick out any words and shapes that you can use to create little elements to create interest amongst your fussy cut flowers and to help tell your story. Look for phrases, tags, tickets and flags that can be layered together nicely. Glue or staple together as you go and adhere to your page.

Step 8
Write your journaling on the cut off manufacturer strips, cut apart and ink each before gluing down the side. Add in your newly coloured black pearls to accent.
Thanks for joining us today and I hope you find some time to create very soon!