How to make a handmade thank you card.

Do you love receiving beautiful handmade cards? Thank you cards are my most used cards in my stash, I am always giving these out to people who help me in my life journey. Design Team Member Ngaire Ashdown has created this beautiful vintage shabby chic style card with lovely lace elements, read on for the detailed step by step tutorial she has created for us.
Uniquely Creative Products Used:
- UCC1734 Misty Rose Cardstock
- UCP2324 Remember When
- UCP2330 Old Times – Fussy Cuts
- UCE1902 Lace Rose Pieces
- UCP2334 Creative Cuts
Other Products Used:
- Paper Trimmer
- Scissors
- Double-Sided Tape
- Foam Dots, Distress Tool
- Square White Card Base (Top Folding)
Instructions:
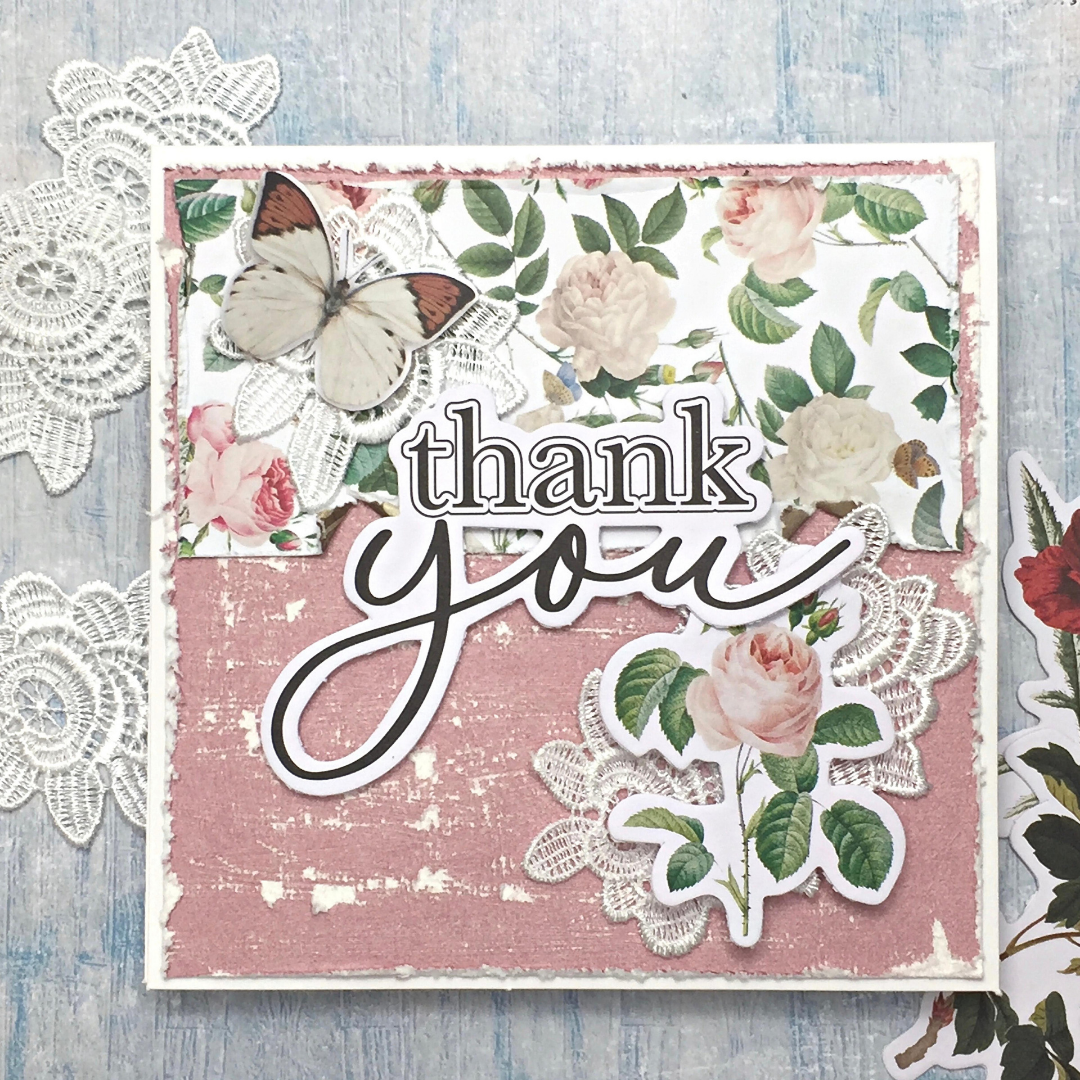
1. Cut a 13cm square piece from the Misty Rose cardstock.
2. Using a distressing tool or sandpaper, distress the surface and edges to reveal the white inner core. Adhere to Cut a 12.5cm x 6cm piece of the Remember When… paper.

3. Distress the edges with the distressing tool. Tear a couple of spots along the bottom edge and fold up the tears. Adhere to the top section of the Misty Rose card stock.

4. Adhere 3 of the lace roses to the card.

5. Using foam dots, add one of the Creative Cuts roses to the lace roses at the bottom of the card.
6. Add the Thank You sentiment from the Creative Cuts pack raising it up using foam dots.

7. Fussy cut one butterfly from the Old Times- Fussy Cuts paper, bend the wings up a little bit and adhere the body only to the lace rose in the top corner. (I used glossy Accents)
