Our Warehouse is Now Closed for Christmas - All Orders will Ship from 7th January 2026
Our Warehouse is Now Closed for Christmas - All Orders will Ship from 7th January 2026
Add description, images, menus and links to your mega menu
A column with no settings can be used as a spacer
Link to your collections, sales and even external links
Add up to five columns
Add description, images, menus and links to your mega menu
A column with no settings can be used as a spacer
Link to your collections, sales and even external links
Add up to five columns
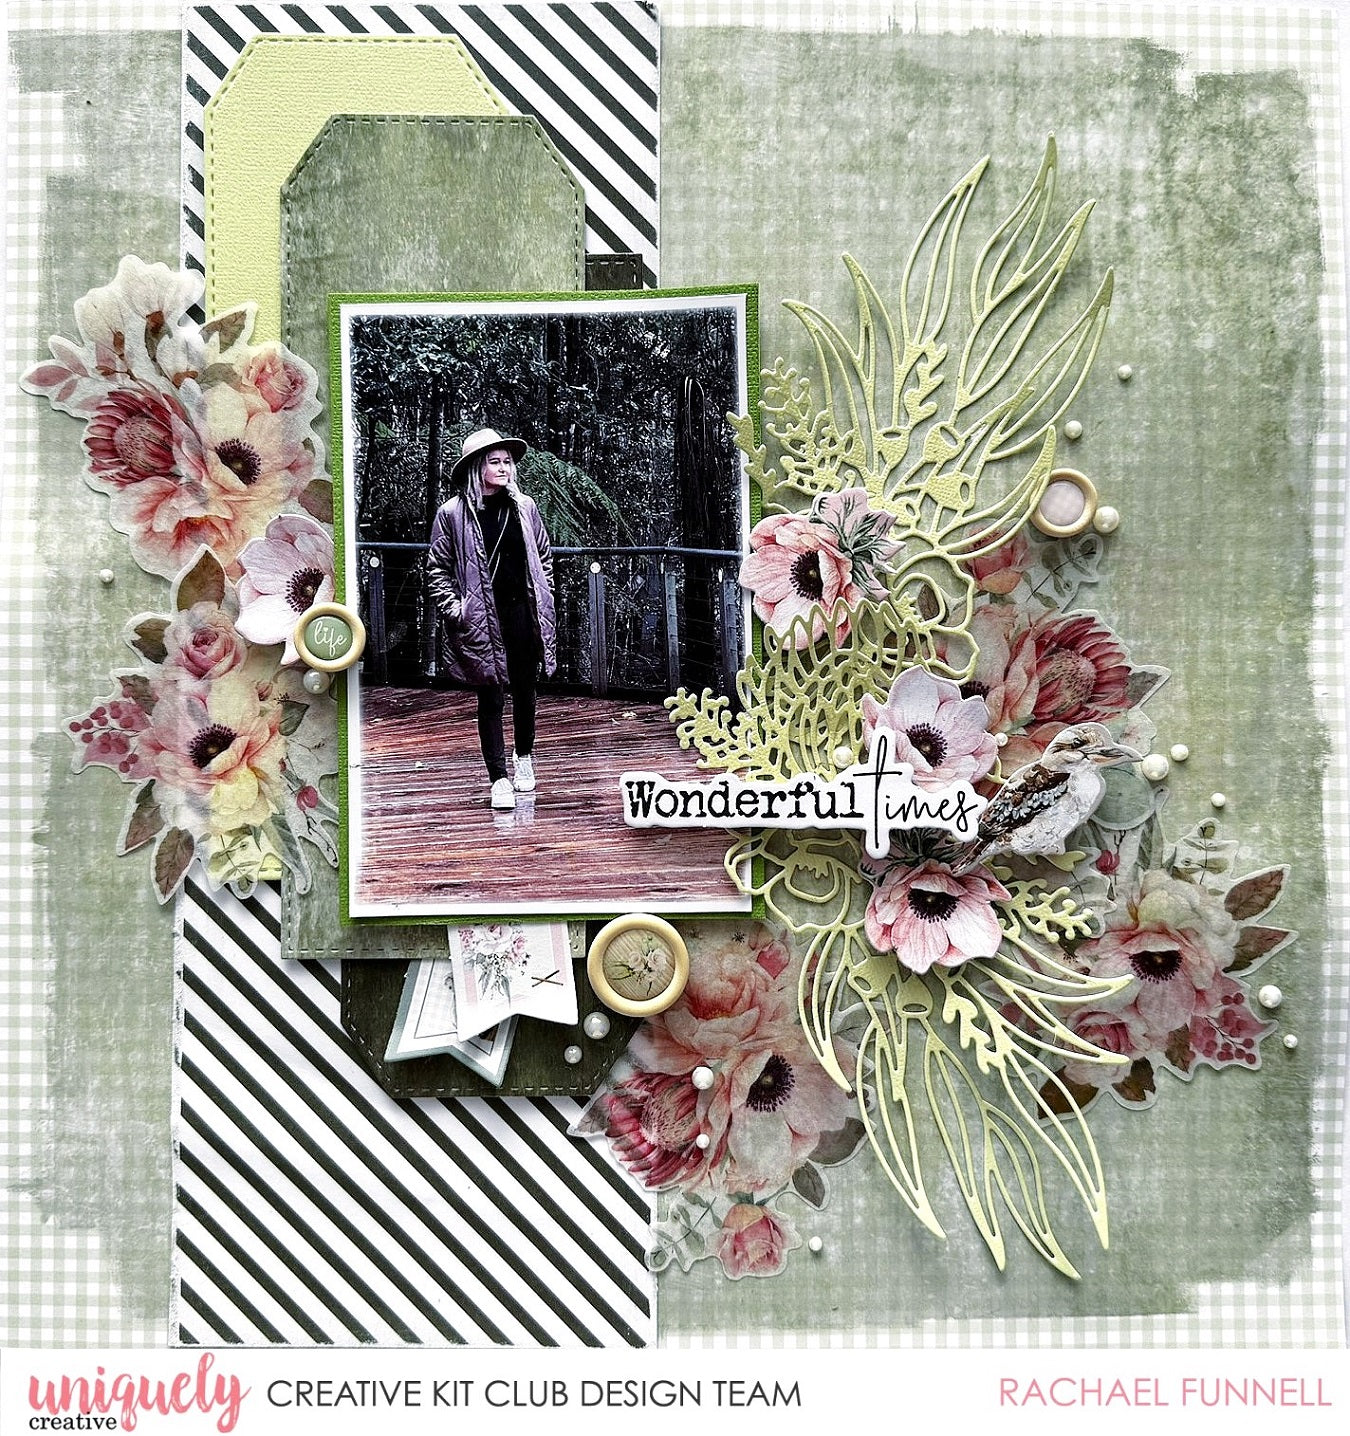
Wonderful Times Tutorial - Rachel Funnell
March 02, 2024 1 Comment

Photo size: 3 1/2" x 5 1/4"
Uniquely Creative Products Used:
- UCP2694 Eucalyptus Dreaming
- UCP2695 Native Passion
- UCP2701 Creative cuts
- UCP2702 Vellum creative cuts
- UCCS115 Cut-a-part sheet
- UCE2005 Wooden Buttons
- UCE1728 Iridescent Pearls
- UCD2130 Protea Bouquet Die
- UCD2134 Slim stitched nesting tag die
- Peonies & Proteas cardstock bundle
Other Products Used:
- UC Scissors, Trimmer
- UC Foam Mounts
- UC Die Release
- UC Sanding Block
- Adhesive tape, glue
- Die cutting machine
Instructions:
1. Use a piece of the Eucalyptus Dreaming paper, remove the branding strip and using the reserve side of this paper as the base of your layout.
2. Using a sheet of the Native Passion paper, cut across the top of the 4 large tags, set the 4 large tags aside.
3. Using the left over strip of the Native Passion paper, flip this strip over to the green stripes, sand all 4 edges using the UC sanding block or some sanding paper, then adhere this strip to left side of the base of your layout - Eucalyptus Dreaming paper.

4. Using a sheet of the light green cardstock & the largest stitched tag from Slim stitched nesting tag die set, die cut out one large stitched tag and adhere this tag to the left side and on top of green stripes.
5. Using this same large slim stitched nesting tag, die cut out two of the four large tags from the Native Passion and adhere one on the green tag and then with the other tag, flip it so it’s upside down and adhere.
6. Mat your photo using a sheet of the dark green cardstock and then adhere your matted photo over the stitched tags using foam mount squares.

7. Select a few vellum creative cuts, remove the backing and adhere two of the to the left side off photo and the others to the right NOTE: I have select only ones with the Peonies flowers but of course you can select which ever flowers works best with your photo/photos.

8. Using the light green cardstock, cut a 3 ½” x 12” strip, then using the Protea Bouquet die and cut out two you Protea Bouquets, then with the pointed end of the die release tool I poked away any pieces of cardstock still stuck. NOTE: will not quite get two full Bouquets die cuts from this strip, but that’s ok it will cross over anyways.

9. Adhere the Protea Bouquet die cut outs to the right side of photo.
10. Select a few of the Peonies, a kookaburra, two of the banners and your title from the creative cuts and adhere onto your layout.

6. Adhere a couple of the Peonies & Protea Wooden buttons.
7. Add of few of the iridescent pearls to your page to finish. (See main image)
1 Response
Leave a comment
Newsletter
Join our mailing list and never miss an update …

Joy
March 16, 2024
Beautiful