30 day change of mind returns available
30 day change of mind returns available
Add description, images, menus and links to your mega menu
A column with no settings can be used as a spacer
Link to your collections, sales and even external links
Add up to five columns
Add description, images, menus and links to your mega menu
A column with no settings can be used as a spacer
Link to your collections, sales and even external links
Add up to five columns
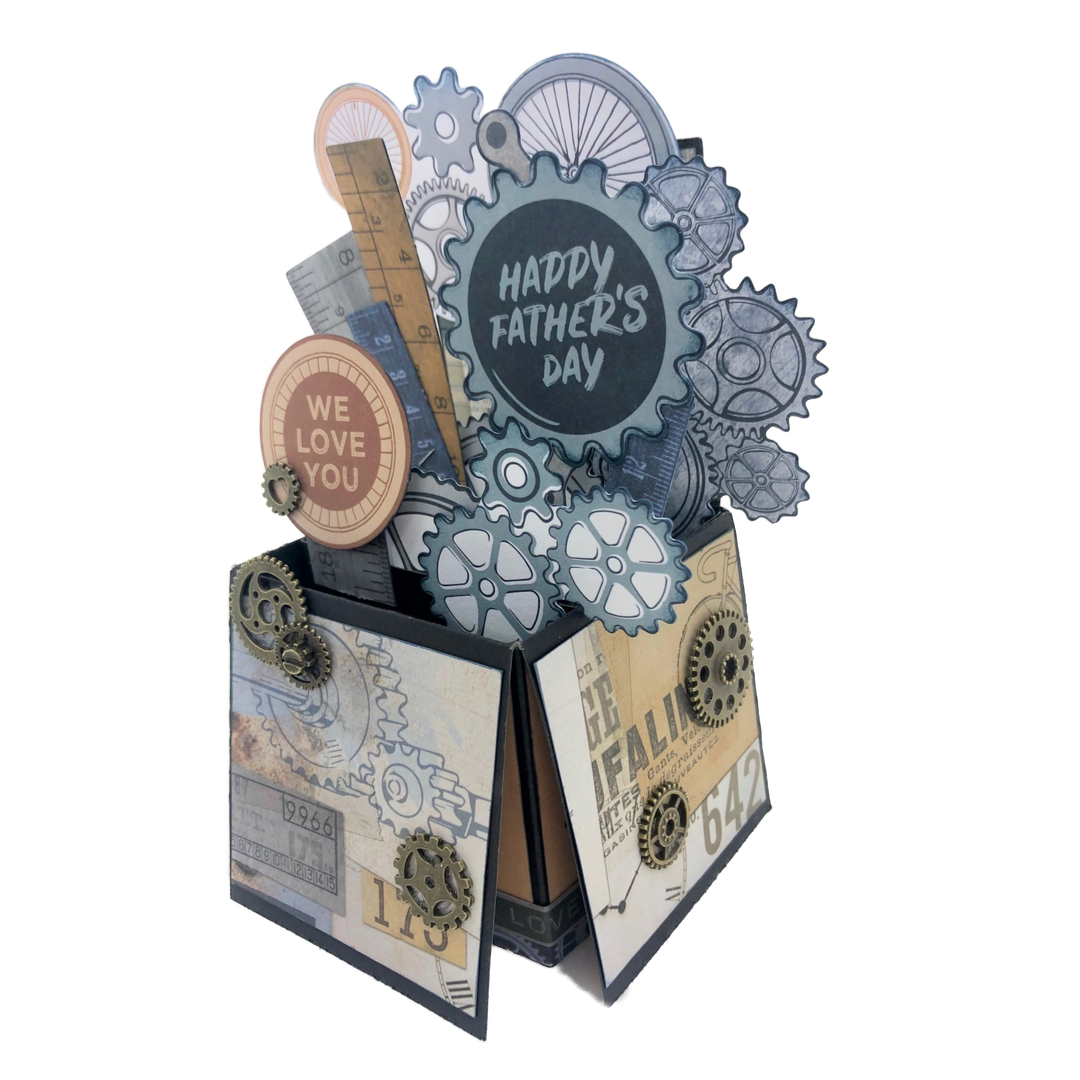
Box Card instructions - Rachel Dutko
October 13, 2019

DT Member Rachel Dutko has written these fantastic instructions on how to make a box card.
- Cut a piece of cardstock to 6" x 12".

- Score on the short side at 3".

- Rotate the card then score on the long edge at the following points : 2 7/8", 5 5/8", 8 1/2" and 11 1/4".

- Trim off the top smallest section.

- Cut along the top score lines down to the middle of the card.

- Fold and burnish all the score lines with a bone folder to create crisp folds.
- Decorate the squares with patterned paper, using a piece slightly smaller than each square. Decorate the bottom four squares, then turn the card over and decorate the top four squares. (It is easier to adhere papers now while the card is flat rather than once it has been adhered into a box shape). To make the back panel extra sturdy, add a longer piece of cardstock before adding patterned paper.
- Add some adhesive to the smallest flap and adhere inside the card to create a box shape.

- To create the bars for the inside, cut 2 pieces of cardstock to 4 7/8" x 1". Score at 1" in at each side.

- Add some adhesive to the small sides and adhere to the inside of the box.

- Adhere some embellishments such as Collectables to the inside bars in varying layers and heights, e.g. using differing layers of foam tape. Make sure not to have too much hanging over the sides as it won't fold flat.
Leave a comment
Newsletter
Join our mailing list and never miss an update …
