Carols In The Forest Tutorial - Jane Clark

Uniquely Creative Products Used:
UC1851 Santa Claws Stamp Set, UCD2013 Santa Claws Die Set, Santa Paws Cut-A-Part Sheet, UC706 First Christmas Stamp Set, Tea Party Stamp Set, UCE1811 Rectangle Card And Envelopes, UCE1803 Squares & Strips Foam Mounts.
Other Products Used:
Distress Oxide Ink Pads - Tattered Rose, Bundled Sage, Squeezed Lemonade, Spiced Marmalade, Worn Lipstick, Blueprint Sketch, Mermaid Lagoon, Hero Arts Intense Black Ink Pad, Sponge Daubers, Smooth White Card.
Copic Markers:
Forest Trees - BV20, BV25, BV29
Tree Trunk and posts - E42, E43, E44, E47, BV25
Mice - E51, E53, Y23, R20, BV02
Gumnut Garland - E35, E37, G22, G24, G94, G99
Instructions:
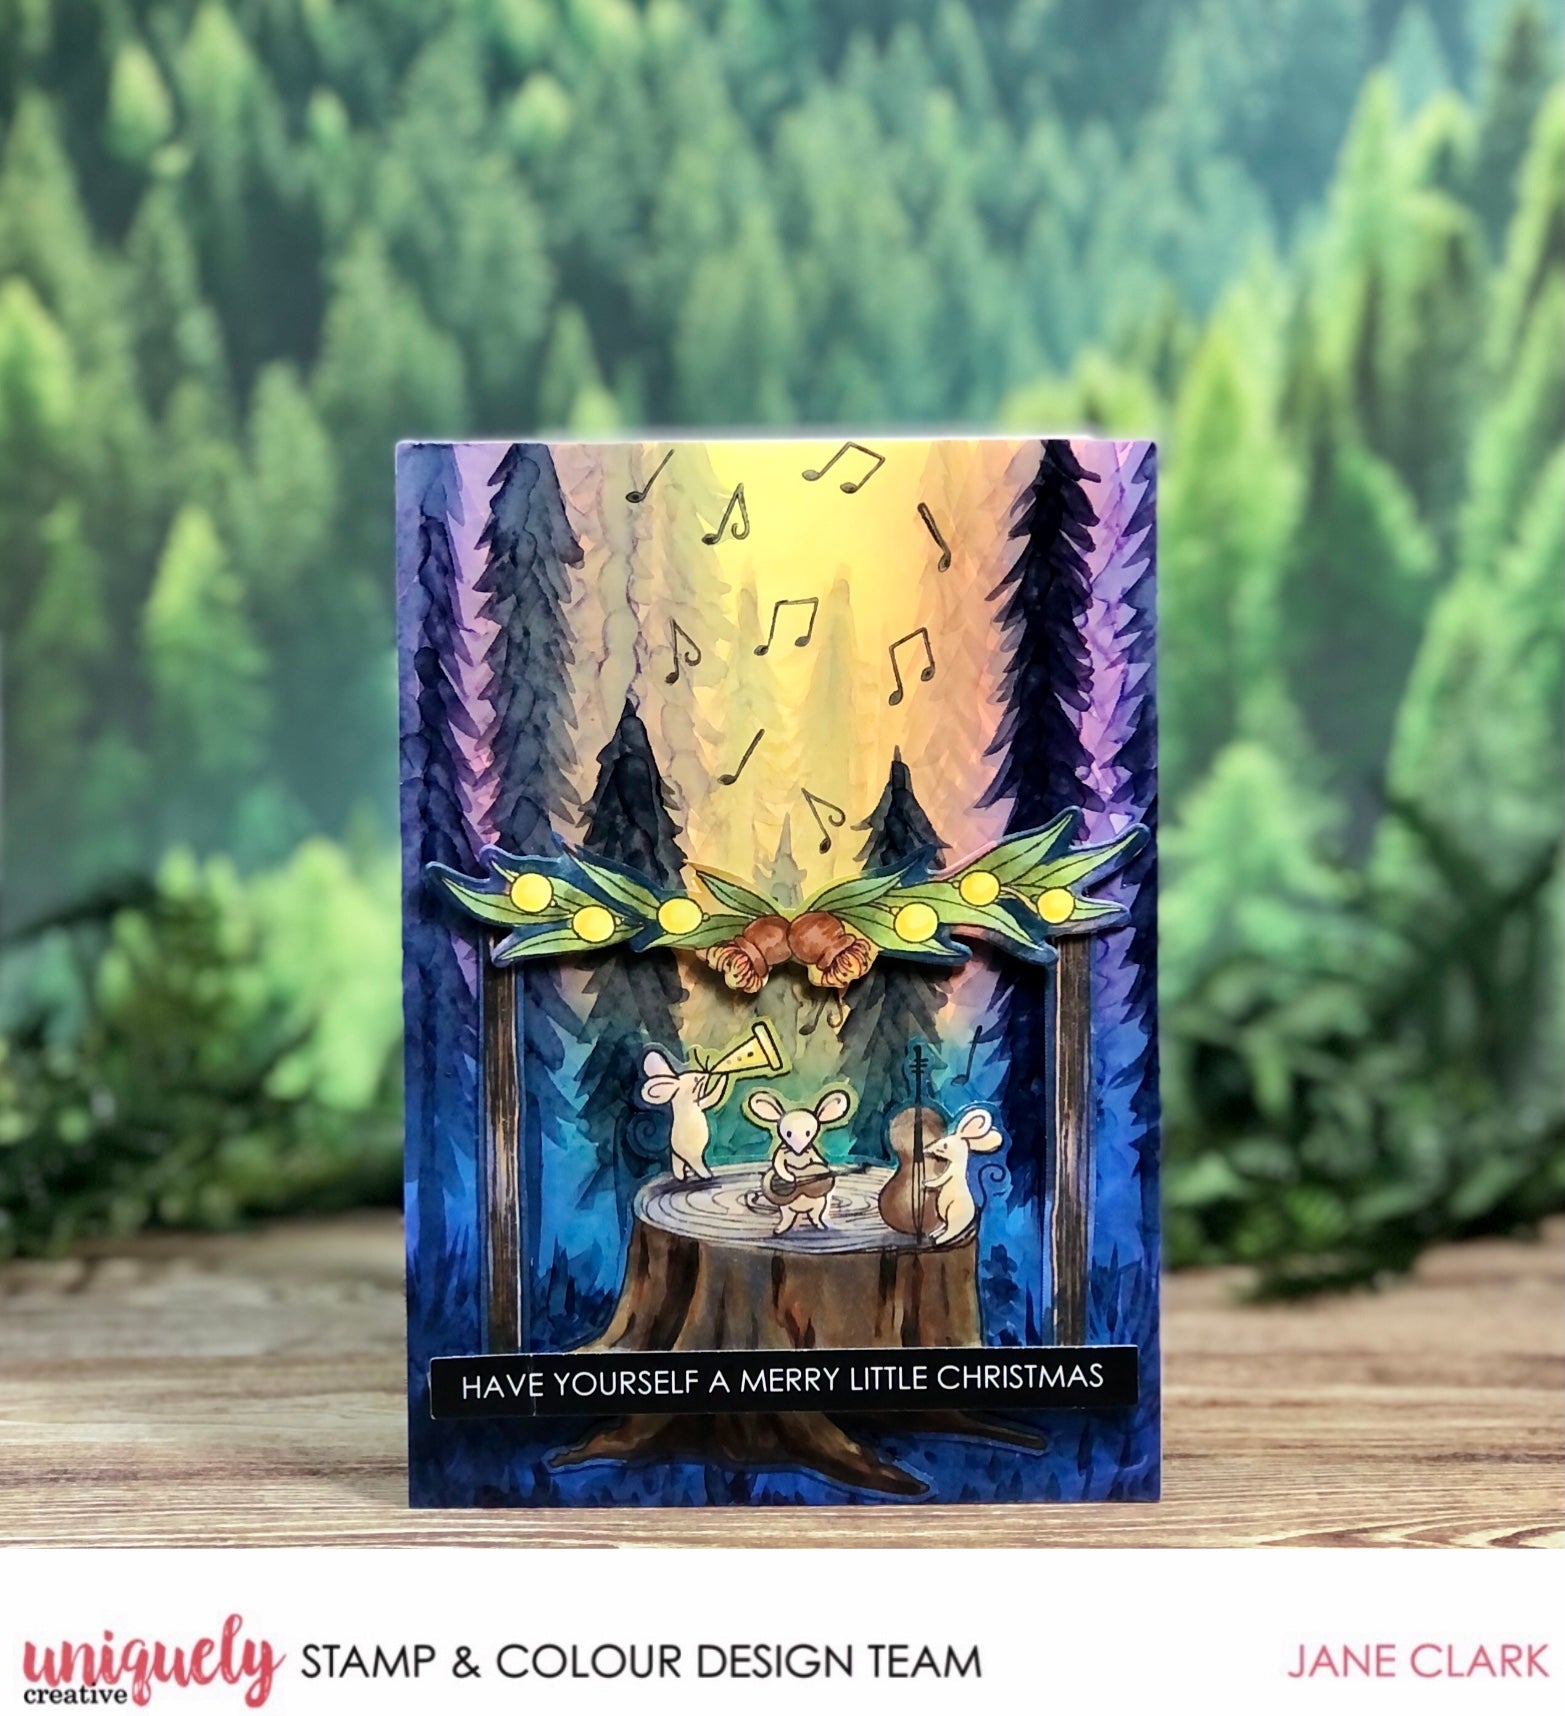
1. Sponge Distress Oxide Squeezed Lemonade and Spiced Marmalade on smooth white card 5 3/4" x 4" as shown. It doesn’t need to be neat and even as it will be mostly covered up.


2. Sponge Distress Oxide Worn Lipstick and Blueprint Sketch.


3. Finally sponge Mermaid Lagoon to cover the remaining white area.

4. Draw long tree trunks and branches to create forest trees using BV20 Copic Marker.

5. Add more forest trees over the top using the BV25 marker, leaving a gap in the centre.

6. Add a few more forest trees on either side and foliage at the bottom using the BV29 Copic Marker as shown.

7. Stamp the three Santa Claws mice images on smooth white card, cover them using a mask then stamp the Tea Party tree trunk over the top as shown using black ink.

8. Colour the mice on the tree trunk using Copic Markers then attach it to the bottom of the work. Stamp Santa Claws music notes above the tree trunk using black ink.

9. Frame the mice on the tree trunk using two stamped and coloured First Christmas wooden posts and a Santa Paws Holly wreath as pictured. Colour all white borders on the images using Copic Markers that match the background. Secure a Santa Paws cut-a-part sentiment to the bottom using foam mount. Attach completed work to the card front.

Cathi Smith
November 26, 2021
This card is stunning!
I’m only just learning again after a 20 year gap…
And it’s all different – even stamping and what ‘embossing’ means has totally changed! So I’m on a very steep and expensive learning curve….
This card, even with the ‘fast’ gadgets and precut pieces, reminds me of the past, with no ‘white edges’ and lots of handiwork ❤🥂