Chocolate Block Gift Card Tutorial - Lydell Quin

Uniquely Creative Products Used:
UCP2286 High Tea Collection Pack, UCP2277 Tea Room, UCP2281 My Cup of Tea-Fussy Cuts, UCP2283 Good Company-Layer Cuts, UCP2285 High Tea Creative Cuts, High Tea Cut-A-Part Sheet
Other Products Used:
Trimmer, Scissors, Ruler, Double-Sided Tape, Foam Tape, Glue, Black Distress Ink, Fine Tip Black Pen, Black String
Instructions:
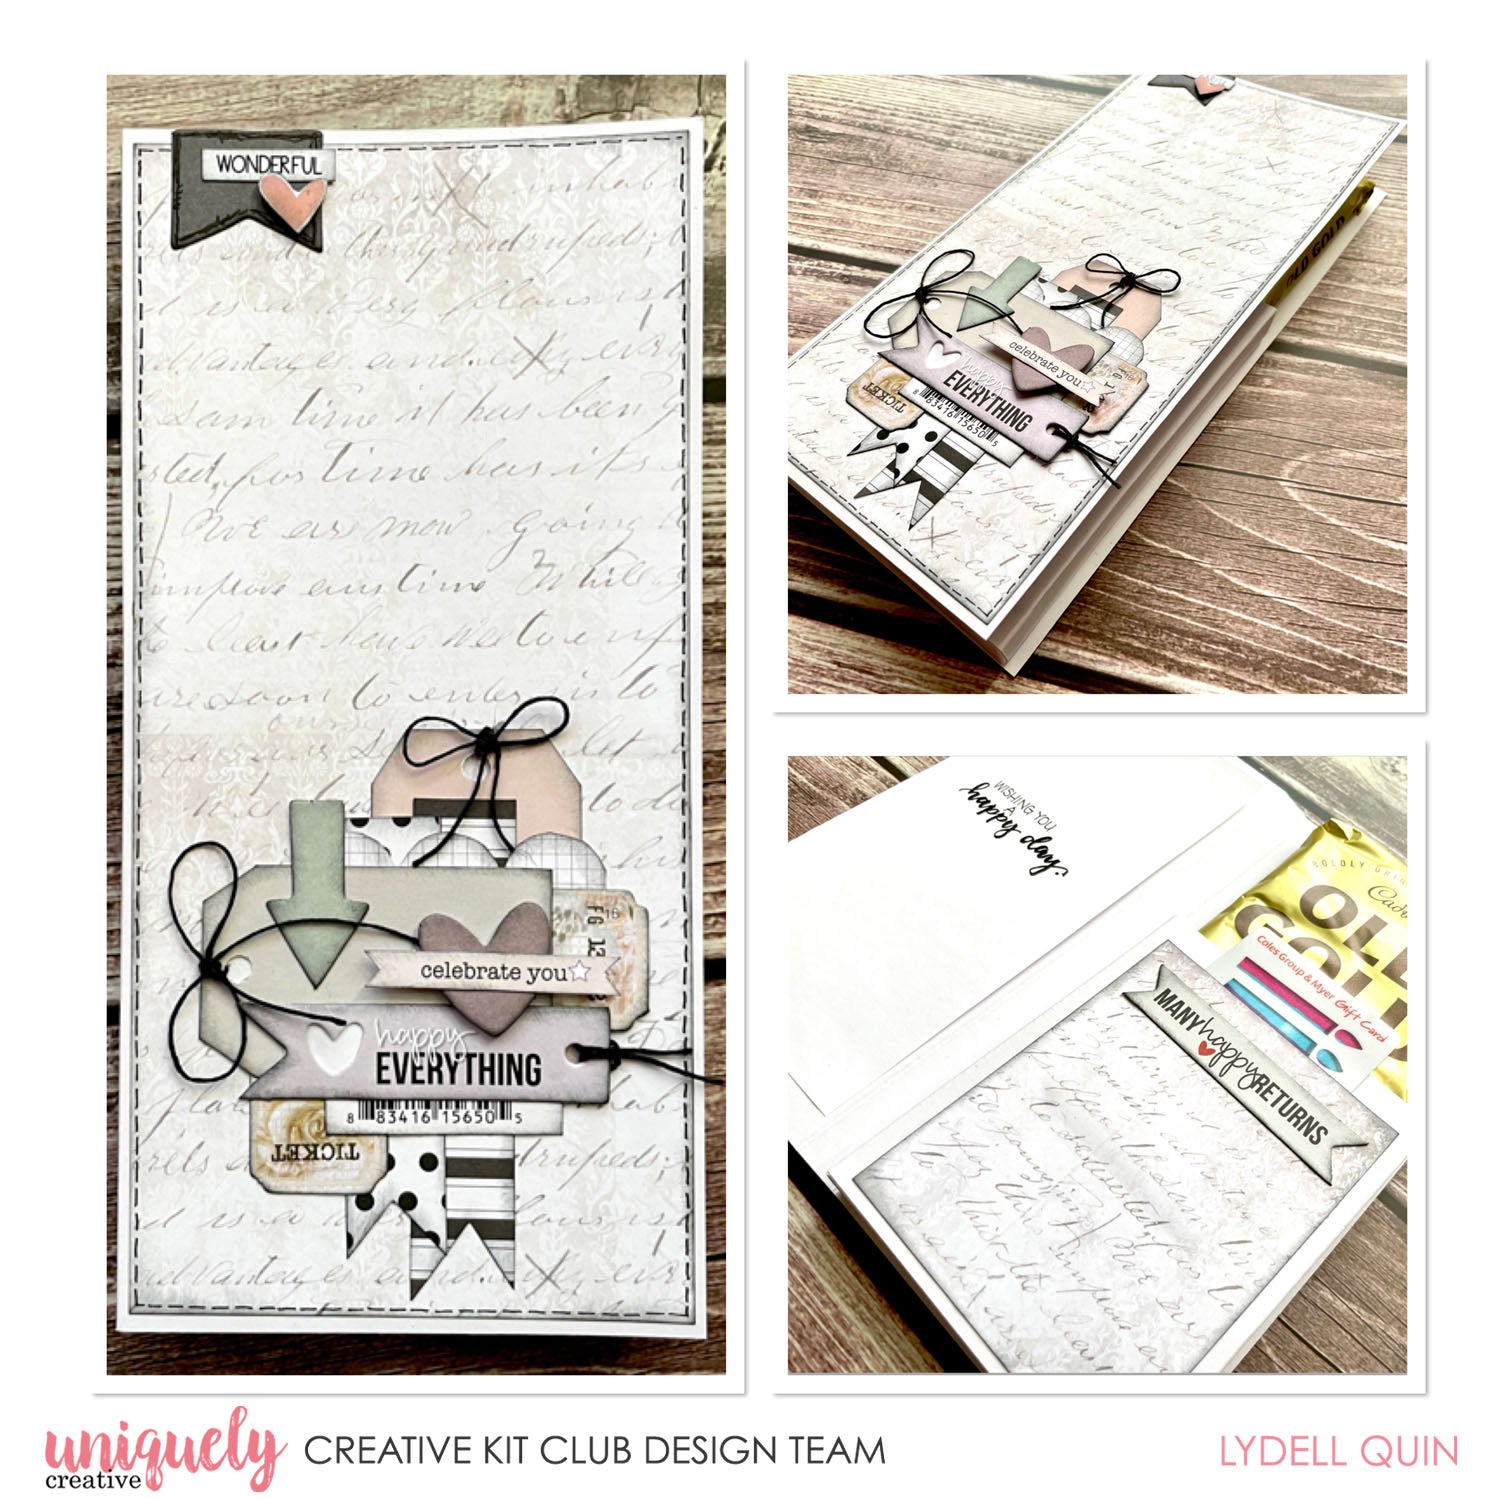
1. TO MAKE THE CARD BASE- Cut a piece of card stock or patterned paper 21.5cm across x 12cm down. Score on the long side at 10cm &11.5cm. Burnish and fold. This will create a card with a 1.5 cm spine.

2. FOR THE INSIDE BOX A - Cut a piece of card stock or co-ordinating patterned paper 14.5cm across and 12cm down. Score lines across the longer side at 1cm, 2.5cm, 12cm, and 13.5cm burnish and fold.

3. FOR THE INSIDE BOX B - Base piece- cut a piece 11.5cm x 3.5cm turn on short side and score at 1cm and 2.5cm. Burnish and fold. Trim out the corner pieces.

4. Add glue on the top piece and apply it lining up the score line with the bottom of the box piece.


5. Fold up all the sides and glue the corners in place then add glue to the top flat sides which will adhere to the card base creating a box.


6. Line up very carefully, the box flap with the inside score line and the bottom of the card, fold the card a little as you do it to check placement before pressing in place.

7. TO DECORATE FRONT Using paper UCP2277 Tea Room cut 2 pieces at 9.5cm x 20cm for the front and back, and a piece 1cm x 20cm for the spine. Ink all pieces and adhere to the front, back and spine of card -See main reference pic.
8. Collect pieces from the Creative Cuts UCP2285 & papers UCP2281 My Cup Of Tea-Fussy Cuts and UCP2283 Good Company-Layer Cuts….ink and start gluing together to create the front embellishment piece. Add a small grouping at the top left with a tab heart and the word wonderful from the cut-a-part sheet. Use foam tape where you’d like some dimension– add faux stitching lines around edges of paper is you like - refer to main image


9. FOR INSIDE DECORATION- Use paper UCP2277 Tea Room cut a piece 8.5cm x 11cm and ink. To make a cavity for the gift card, trace the gift card on the back side of the Patterned Paper. Apply glue around the outside of these markings and adhere to the front side of the box.
10. Add a greeting piece that is suitable to the box front and cut a piece of copy paper for an insert (especially if you used patterned paper) approx 9cm x 19cm. Write on your greeting and tape it at the top with double sided tape.


3 Responses


Mary Wood
January 25, 2022
I really like this and I do have a friend that loves chocolate!