Dreams Do Come True Tutorial - Ashleigh Freeston

Uniquely Creative Products Used:
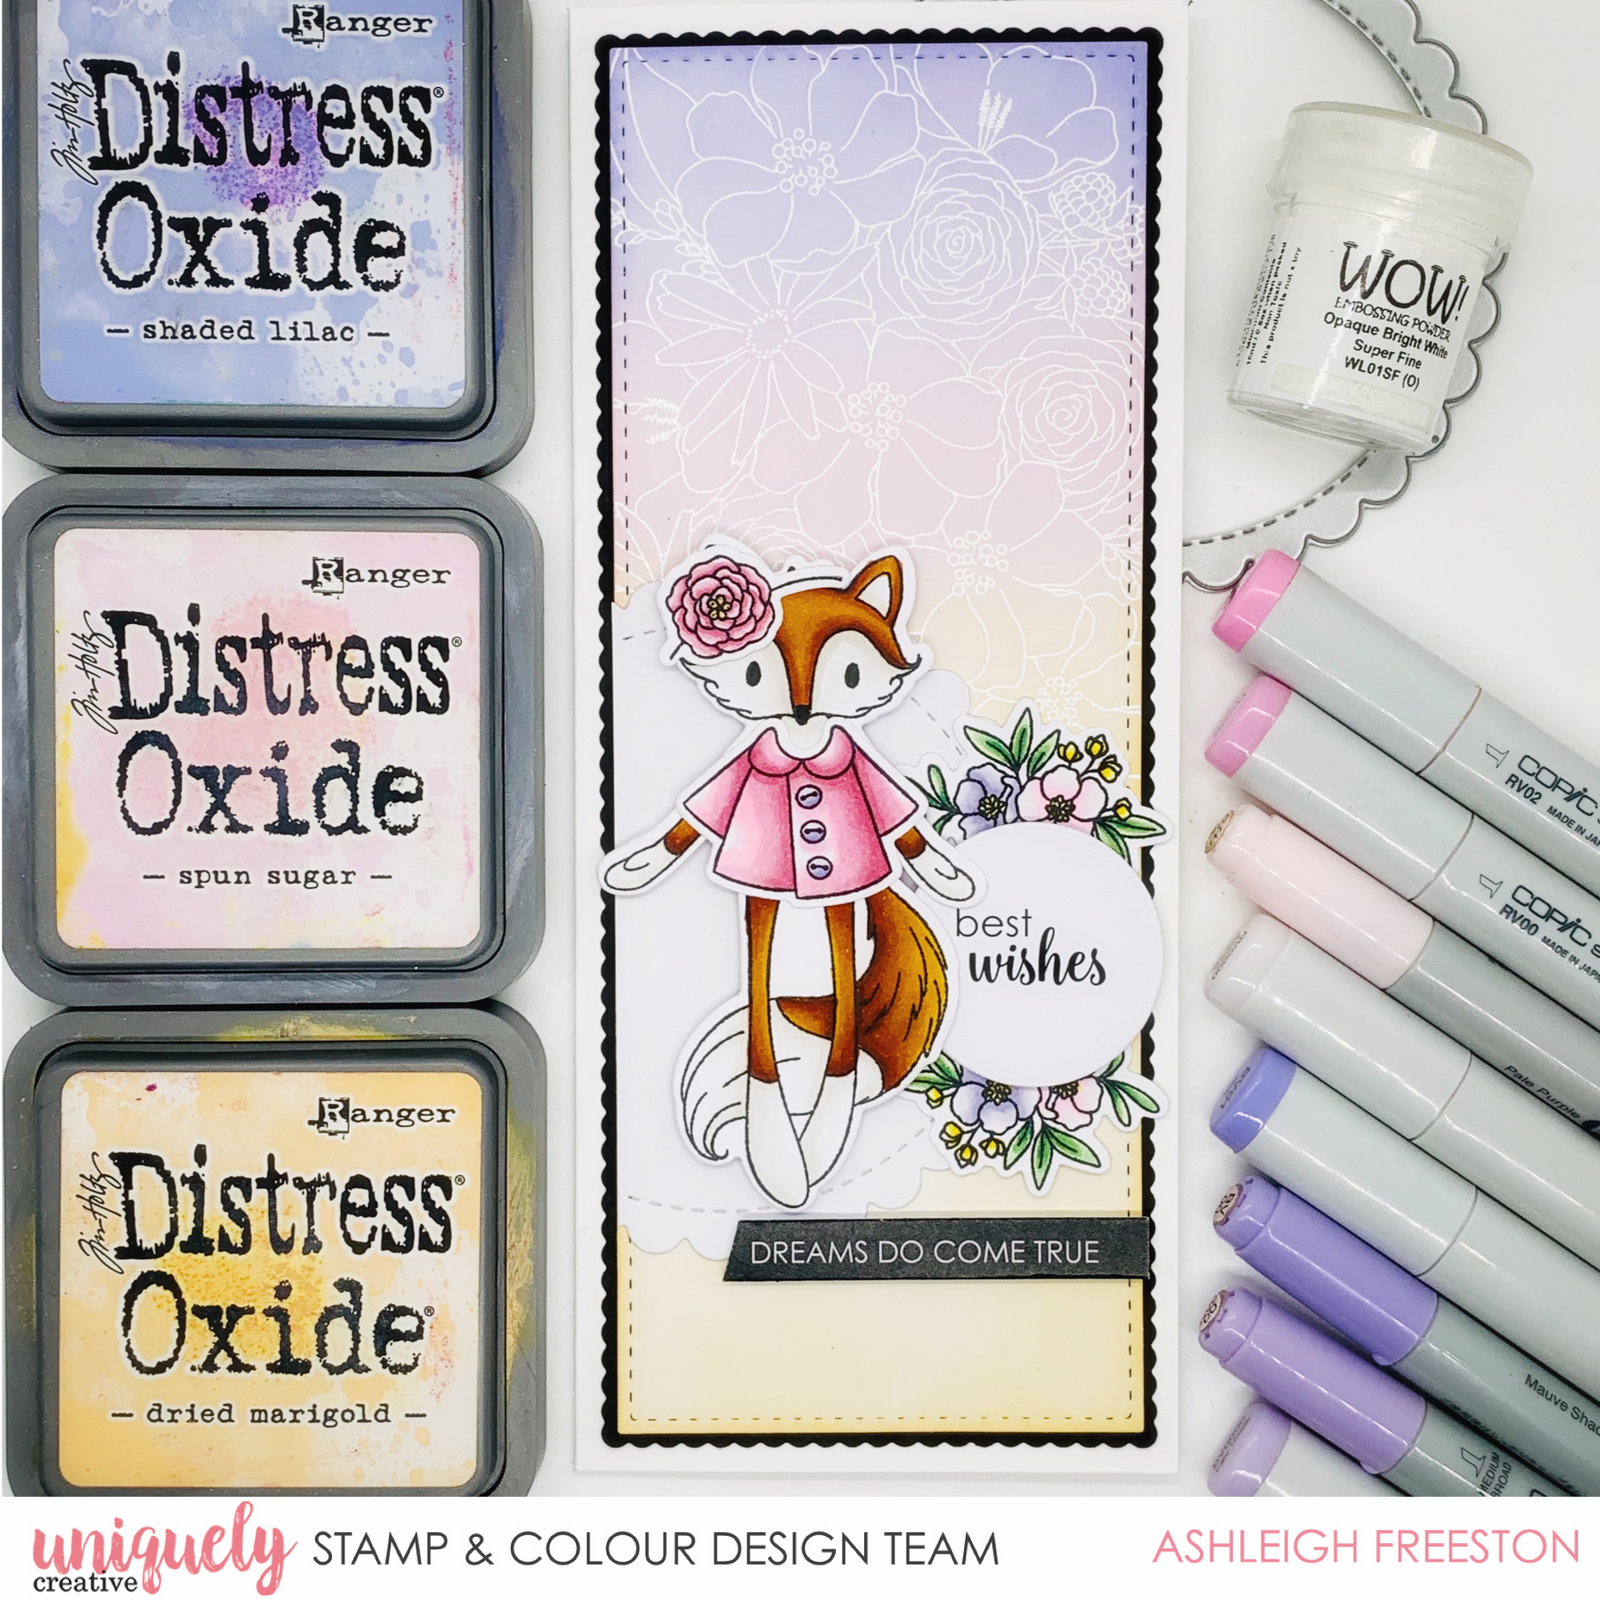
UC1844 Fox Builder Stamp Set, UCD1992 Fox Builder Die, UC1843 Cake Builder Stamp Set, UCD1993 Cake Builder Die, Fox Builder Cut-a-Part Sheet, UCD1972 Slim Stitched Nesting Rectangle Die, UCD1973 Slim Scalloped Nesting Rectangle Die, UC1803 Floral Bunch Stamp Set, UCD1765 Stitched Scallop Circles Die, Cut-a-Part Essentials #5 Die, Cut-a-Part Essentials #6 Die, Slimline Card & Envelopes, Uniquely Creative Blending Brush
Other Products Used:
Copic Colours:
Fox – E18, E09, E08, YR27, YR24 (outer); W1, W0, W00 (inner)
Coat/Headband – RV10, R81, R83, R85
Flowers – G20, G21, G24, G28 (leaves); BV0000, BV000, BV00, BV01 (purple); RV0000, RV000, RV00, RV02 (pink), Y23, Y35, Y38 (yellow)
Smooth White Cardstock, Black Cardstock, Distress Oxide: Shaded Lilac, Spun Sugar & Dried Marigold, Versamark Embossing Ink, White Embossing Powder, Adhesives
Instructions:
1. Die cut Slim Stitched Nesting Rectangle Die from white cardstock. Die cut Slim Scalloped Nesting Rectangle Die from black cardstock.
2. Position Floral Bunch Stamp Set in stamp positioner and line up with top section of Slim Stitched Nesting Rectangle. Ink with Versamark embossing ink and heat emboss with white embossing powder.

3. Using a blending brush, ink Shaded Lilac at top section of background. Repeat with Spun Sugar and Dried Marigold, until you reach the bottom of the piece. Wipe any excess ink from embossed areas with a dry paper towel.

4. Die cut scalloped circle die from white cardstock and cut down. Die cut sentiments from Cut-a-Part Sheet with Cut-a-Part Essentials #5 & #6.
5. Stamp and colour all images with the colouring medium of your choice (I used Copic Markers). Die cut with matching fussy cutting dies.
6. Adhere the background piece onto the scalloped rectangle, and then onto the card base. Adhere the scalloped rectangle to the bottom left of the card. Use foam mounts to adhere the images and sentiments to complete the card.
