Our Warehouse is Now Closed for Christmas - All Orders will Ship from 7th January 2026
Our Warehouse is Now Closed for Christmas - All Orders will Ship from 7th January 2026
Add description, images, menus and links to your mega menu
A column with no settings can be used as a spacer
Link to your collections, sales and even external links
Add up to five columns
Add description, images, menus and links to your mega menu
A column with no settings can be used as a spacer
Link to your collections, sales and even external links
Add up to five columns
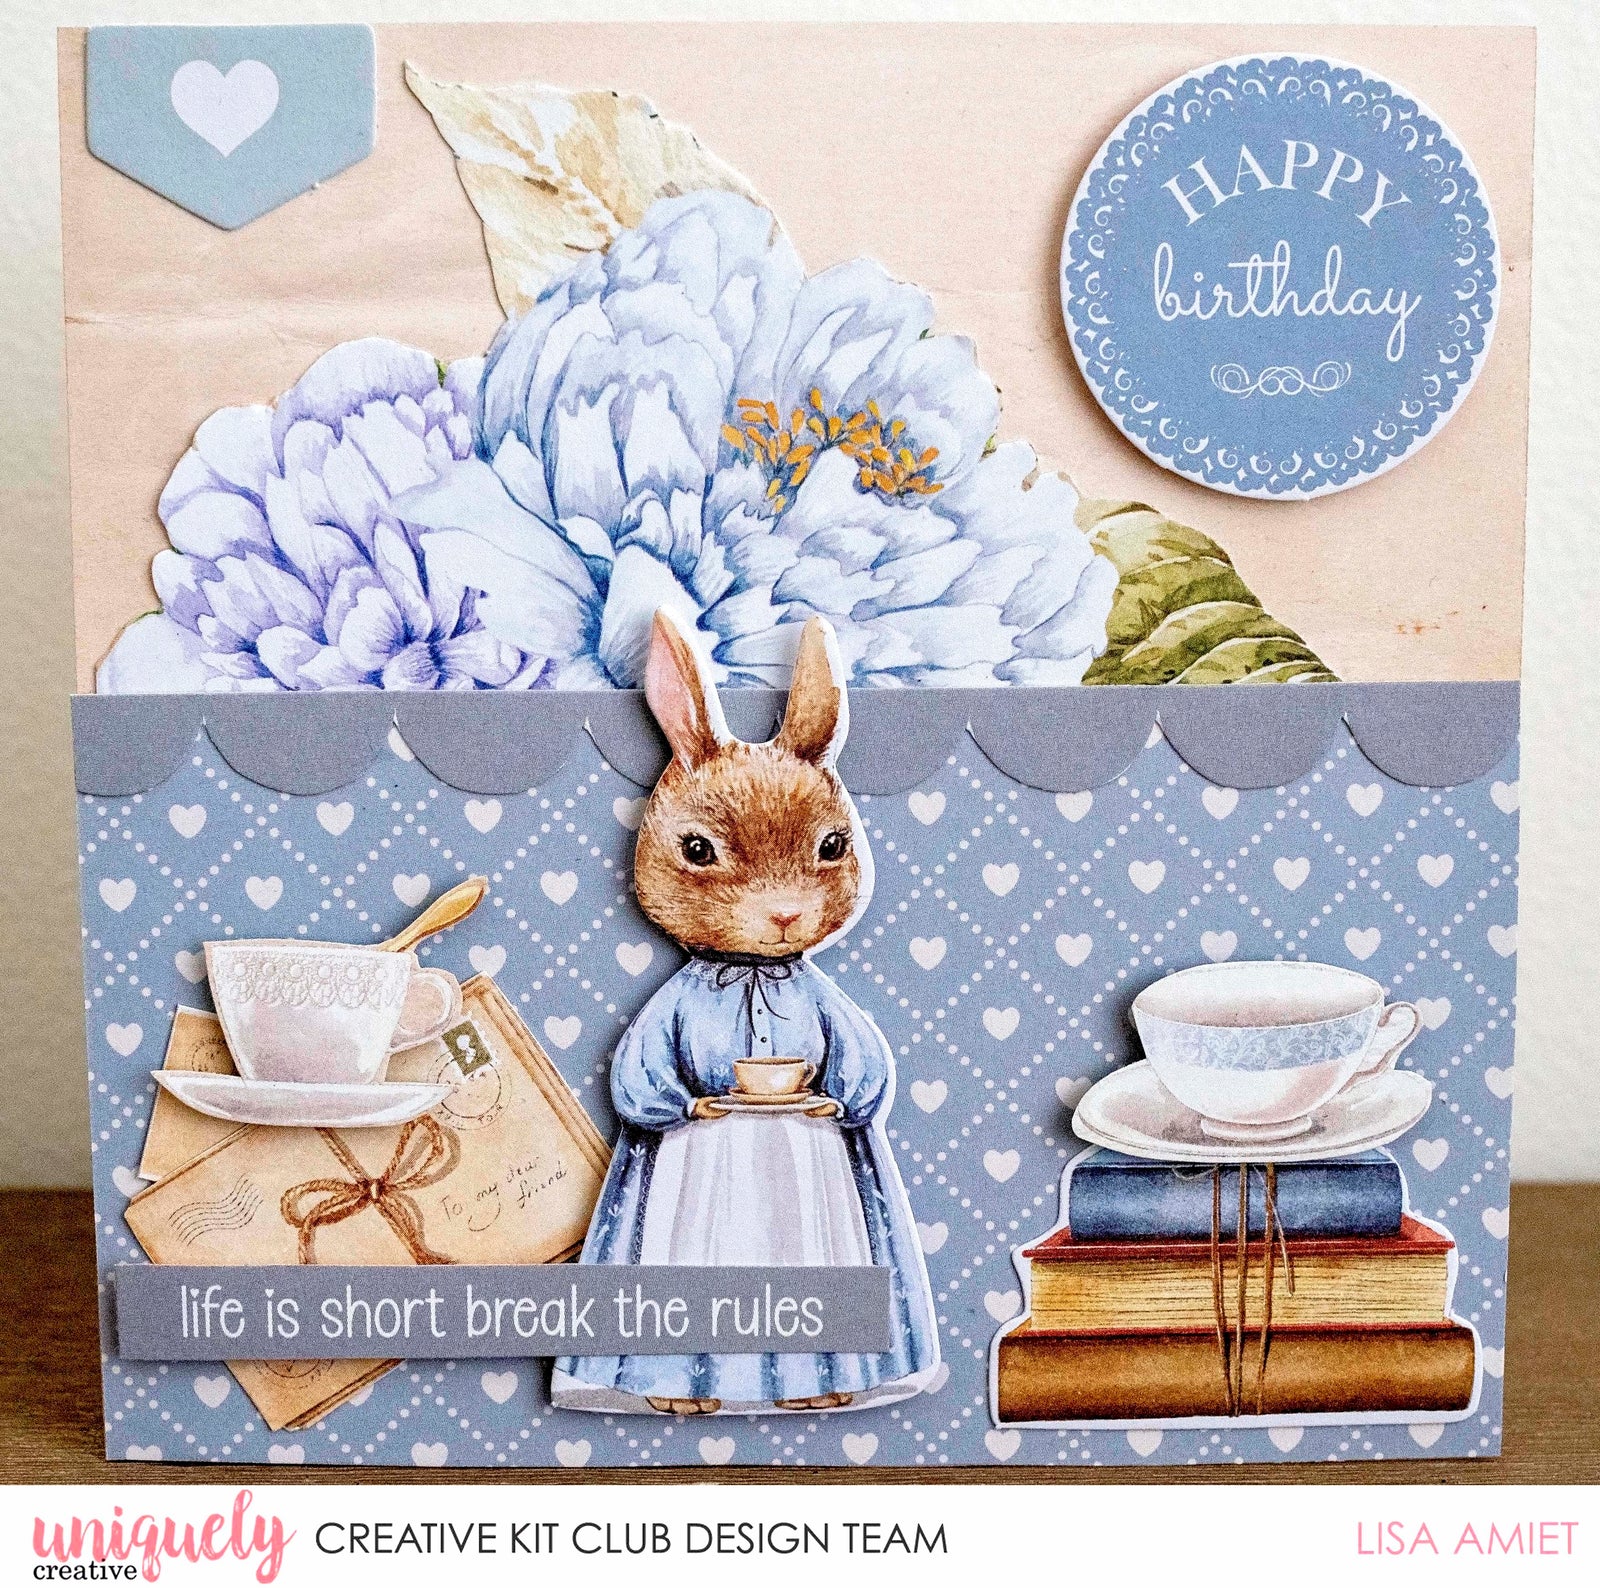
Happy Birthday Tutorial - Lisa Amiet
February 12, 2022 1 Comment

Uniquely Creative Products Used:
UCP2314 Characters, UCP2316 Secrets, UCP2317 English Rose, UCP2320 Book Week, UCP2323 Story Garden Creative Cuts
Other Products Used:
Trimmer, Scissors, Double-Sided Tape, Foam Tape, White 5 ¼” Square Card Blank
Instructions:
1. Cover the card front with a 5 ¼” piece of English Rose paper. Fussy cut floral from Secrets paper and adhere to top left half of card. Cut a 3 x 5 ¼” piece of Secrets paper. Adhere to bottom half of card, overlapping floral.

2. Fussy cut blue scallop strip from Book Week paper, and adhere to centre of card, overlapping join of previous pieces

3. Adhere book stack from Creative Cuts to the bottom right corner of card. Fussy cut letter from Characters and Book Week papers, adhere, layering to bottom left corner of card.

4. Fussy cut teacups from Characters paper. Adhere one, with foam tape, to the top of the book stack and the other layered over letters

5. Adhere bunny character from the creative cuts, with foam tape, to the centre of bottom half of card.

6. Fussy cut quote from Book Week paper and adhere to card, layering over letters and bunny, using foam tape on half of it.

1 Response
Leave a comment
Newsletter
Join our mailing list and never miss an update …

Wendy Schultz
February 13, 2022
Such a beautiful Birthday Card Lisa! I love this ’Story Garden, collection by Uniquely Creative Kit Club who have the most Gorgeous, Papers and Kits and so much more in their Stunning Kits Collections, Your tutorial was great and very easy to understand follow.. Thanks for sharing.