Make a layered Easter Card with Stamped Images

Adding layers to your cards will create dimension and make your card pop
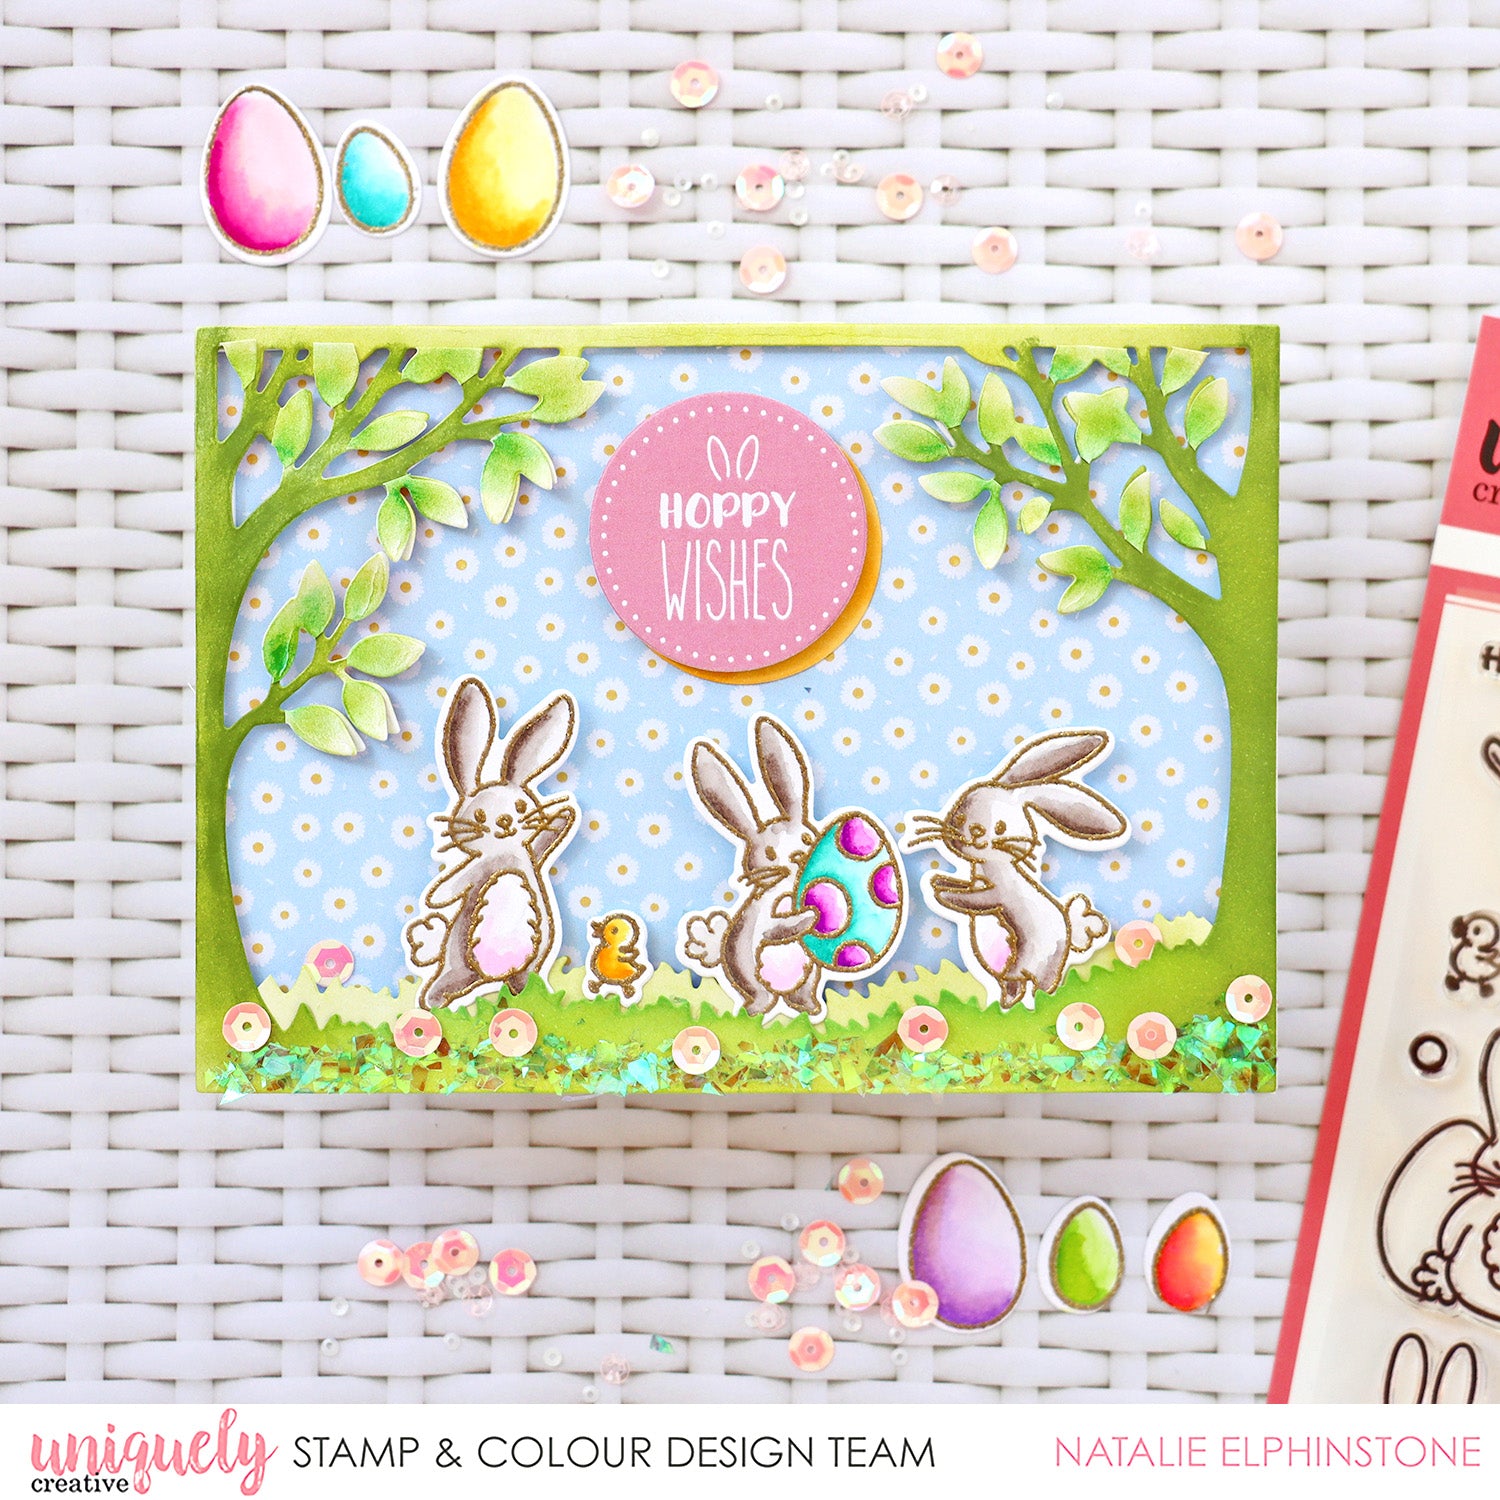
Design Team member Natalie Elphinstone uses many layers to build up the background of this adorable Easter card. She has used glitter in the foreground for a lovely finishing touch.
Uniquely Creative Products Used:
- UC1858 Be Hoppy Stamp Set
- UCD2040 Be Hoppy Die Set
- UCD2041 Nature Scene Die
- Be Hoppy Mini Cut-a-part Sheet and Patterned Papers
- Uniqolour Markers
- Watercolour Paper
- Foam Squares
- UCD1985 Cut-a-Part Essentials #6 Die
- Cotton Candy Sequins
Other Products Used:
- Gold Glitter Embossing Powder,
- Studio Calico Inks
- Glitter
1. Using the Nature Scene die cut two backgrounds out of plain white paper or cardstock. One of these will form the basis of the background, and the other you are going to cut to pieces to use as layers on top of it. Colour one of them fully (I used stencil brushes to blend different green inks all over it), and the other one needs to only have it’s leaves and grass coloured. Use a small dry paintbrush with an ink pad to colour the tiny little leaves – and still use two tones of green ink to really add depth of colour.


2. Use fussy-cutting scissors to cut out each leaf from the ‘plain’ die cut and then glue it on top of the ‘main’ die cut. Adhere them just at the base, and then bend them up so the leaves look like they’re popping out towards you.
Also cut out the strip of grass from the ‘plain’ die cut and adhere it behind the ‘main’ die cut to form another layer here too.
When it’s dry, adhere it to a background of blue patterned paper with foam tape so it really had lots of dimension.

3. Stamp, emboss, colour and die cut some of the super cute bunnies and little chicks. My favourite technique to colour is using watercolour paper and the Uniqolour Markers.

4. Adhere your bunnies into the scene with foam tape, as well as a circle sentiment from the Mini Cut-a-Part sheet. And to finish it off add a generous sprinkle of aqua glitter and pink sequins to really make it fun.

Glenn Nilson
January 31, 2026
The easter layering kit you did not have a price please could you tell me.
Regards.
Glenn