How to Scrapbook: A Fun Step-by-Step Guide

How to Scrapbook: A Quick & Fun Step-by-Step Guide
Have you been wondering how to scrapbook and create something wonderful? Now's the time to get started! Our beginner's guide will walk you through the process, and list all the supplies you'll need. Don't let the fear of the unknown hold you back.
What is a scrapbook?
A scrapbook is an album or book with blank pages for people to stick in their recipes, newspaper clippings, tickets, mementoes and more. Over time, it has evolved into a fullblown papercraft where people create beautiful album designs and pay careful attention to the layout of each page. Through scrapbooking, you can preserve your family photos and memorabilia. The albums become keepsakes for future generations to enjoy.
Scrapbooking Supplies List
Every beginner needs a few basic scrapbooking materials to get started. As you get more skilled, you can experiment with all kinds of fun papercrafting tools. In the meantime, here’s a list of essentials:
- Album
- Patterned Papers
- Cardstock
- Scissors
- Double-sided tape
- Adhesives
- Pens and Markers
- Photos
If you’re unsure where to buy scrapbooking supplies, try Uniquely Creative’s quality scrapbooking paper and products.
How to Make a Scrapbook Album: 7 Simple Steps
Step 1: Choose a Theme for Your Album
Establishing a specific theme for your album is a great way for a beginner to start scrapbooking. Common examples of themes include weddings, school days or birthdays, but it could also be the year in review or holidays, even your pet. Having a theme will help you with your colour pallet and enable you to continue page layout designs throughout the album for consistency.
Step 2: Choose Your Photos and Memorabilia
Once you have decided on a theme, sort through your photos and mementos to find all the ones related to the theme. You do not have to use every photo. Choose the ones with the best lighting and focus. We also recommend not using your original photos, especially when you are just beginning. Having copies printed to scrapbook is a good idea.
Look for any memorabilia that ties in with your theme will make a great inclusion in your scrapbook and will enhance the layout. Memorabilia can include things like strands of baby hair, lace from special garments, a ticket stub, newspaper clipping or even a menu.

Step 3: Choose Your Album Size & Type
Now that you have chosen your theme and collected all of your photos and memorabilia, it is time to decide upon your album size and type. The album size will influence other purchases such as the paper sizes that you go for.
12x12” albums are a popular size! And if you are just starting out you might want to purchase a smaller album such as the Uniquely Creative 8x10” album. This is well suited to using less photos and less embellishments as the pages are smaller. It is also a D-ring album which means that you can move pages around if you need to. Some albums, such as spiral bound albums, have the pages fixed in place which means that you cannot move them around once you have created your layout.
Step 4: Collect Your Materials and Supplies
Once you have decided on an album size, you will want to look at buying some scrapbooking papers, cardstock and embellishments in colours that will suit your theme.
There are so many choices of papers, stickers and more! It can even become overwhelming to choose. However, an easy way to overcome these feelings is to purchase a scrapbooking kit. It takes all the hard work out of choosing your supplies. You should also use acid-free adhesives to prevent the paper and photos from deteriorating over time.
Step 5: Create A Page
Now the fun begins! You can start playing around with the design or layout of your page. Use sites like Pinterest or Google to search things like ‘easy scrapbook page layouts for beginners’ which will provide you with a range of simple scrapbook layout idea templates and scrapbook sketches that you can use for inspiration in your album. You can also find scrapbooking ideas and layouts on the Uniquely Creative website.
When planning your layout, remember to factor in that most pages will have the following elements: photos, memorabilia, embellishments, a title and journaling. Limit the number of photos per page as well as the number of embellishments used so that you do not end up with an overcrowded layout.
For beginners it works well to choose a layout that is repeatable so that you keep a consistent look throughout your album.
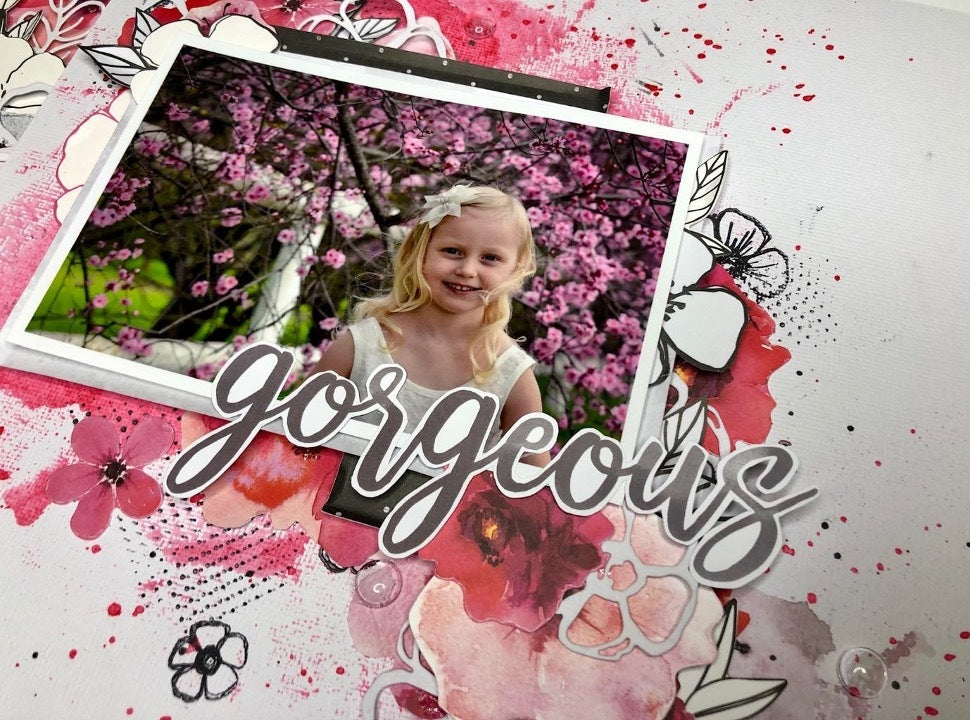
You will want to create a focal point for your layout. This could be the photo that the eye is drawn to first. To enhance this photo, you may decide to mat the photo. This refers to creating a border or frame. You can do this with plain/patterned paper or cardstock. Simply choose the paper or cardstock that you wish to use to mat the photo, then cut out a piece slightly bigger than the photo itself. Then, stick the photo to the mat that you have just cut out using double-sided tape or adhesive. See the example in the layout below.

Now, choose a background paper that you will build your layout on. This can be patterned or plain, whatever your preference. Then, put your background paper down on your work surface and begin by placing your chosen photos and memorabilia onto this paper.
Move them around as much as you like and don’t be afraid to try different angles, even overlapping and layering elements until you are happy with the look. Remember to leave space for your title and journaling.
Once you are happy with the layout, take a quick photo of it on your phone so that you can use it for reference. From there, you can start sticking all the elements to the background paper.
Step 6: Page Title and Journaling
There are numerous methods that you can use for the title and journaling on your layout. If you feel anxious about writing directly onto the layout then you can do your title and journaling on a separate piece of paper or cardstock and then add it to the layout. This way if you make a mistake, you can correct it without ruining your page.
Begin with the basics of who, what, where and when. When you gain more confidence in creating your scrapbooking layouts then you can add more details. You may choose to journal in a storytelling fashion or just in bullet points, it is entirely up to you. If printing your journaling, be sure to use fonts that are easy to read.
Step 7: Add To Your Album
Once you have completed your layout, you can put a page protector over it to keep it safe. Then you can add your page to your album. From there, you simply continue creating scrapbook pages and adding them to your album. Before long you will have completed your very first scrapbook album!
More Scrapbooking Tips for Beginners
Scrapbooking is a rewarding craft that creates beautiful keepsakes. Here are a few scrapbooking tips for true beginners:
- Create balance by adding the same elements to the top, bottom and sides of the page.
- Add some texture. Textures can be flat layers such as stamps or mixed media elements such as paints, burlap, cork, muslin, corrugated cardstock, or even wire.
- Match cardstock and paper by choosing similar colours from the same family for both. For example, if you choose a green element, is it a warm green or a cool green? Stick to that family. Or you can use the opposite colour from the colour wheel if you want a contrast. Nevertheless, try not to add too many clashing elements.


4. Follow the rule of thirds by placing your photos and embellishments on the third line to create a visual triangle with your embellishments. This draws the eye to your photo.


5. Add mixed media elements such as water colour paints to create a background for your layouts.
Using stencils and texture paste over your painted layers can add another fun dimension.
6. Crop your photos, either in an app or with your trimmer once you have had them printed. You want your subject to be your focus, and you can remove any distractions this way.
7. Most of all, have fun!!!
Related Questions
How long does it take to make a scrapbook?
The time it takes to make a scrapbook varies from person to person. It depends on your level of experience and the complexity of the pages that you create. In the beginning, it may take you 2-3 hours to complete even a simple layout.
How much does it cost to make a scrapbook?
Scrapbooking can cost as much as you are willing to spend! But do remember that you do not need to have all of the tools or all of the papers, embellishments etc. to get started. You can still create gorgeous layouts and albums without overspending.
Is scrapbooking a hobby?
Scrapbooking is a hobby undertaken by many and it can be very fulfilling to preserve family photos and memories in a creative way for loved ones and future generations to cherish.
Is scrapbooking still a thing?
Scrapbooking is definitely still a thing and is still widely enjoyed by many people of all ages. In the digital world that we live in, scrapbooking remains a popular way to print photos and preserve memories.
3 Responses


Jua
December 08, 2025
Umm u beed more pictures bro