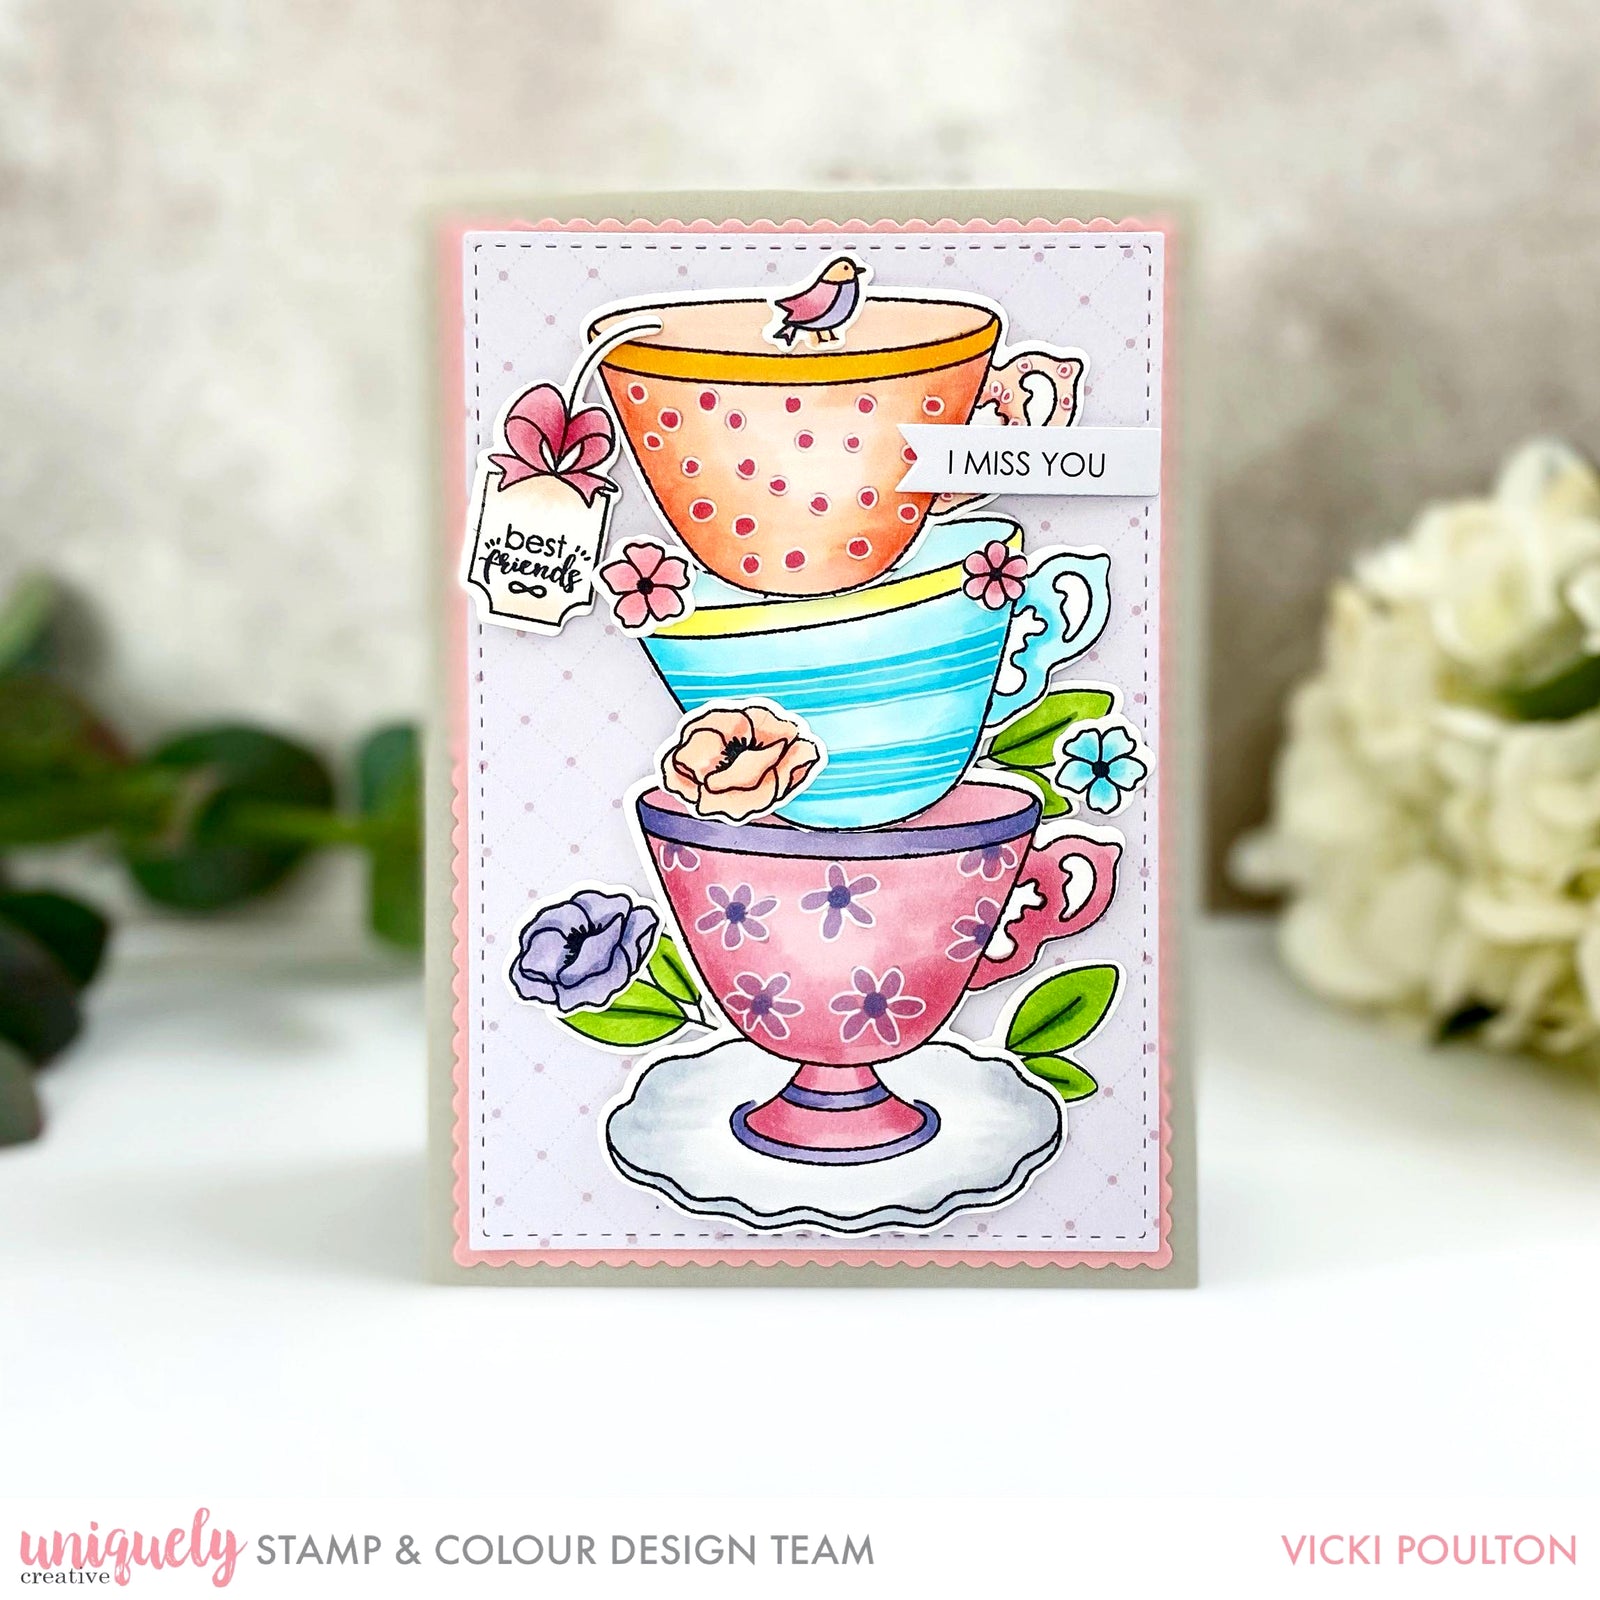
I Miss You Tutorial - Vicki Poulton

Card Size: 4 1/8 x 5 3/4
Uniquely Creative Products Used:
UC1842 Teacup Builder Clear Stamp Set, UCD1987 Teacup Builder Dies, Teacup Builder Mini Cut-A-Part Sheet, Pattern Paper (Included in kit) UCD1974 Stitched Nesting Rectangle Die, UCD1975 Scalloped Nesting Rectangle Die
Other Products Used:
Copics:
Teacup: N1, BV31, BV00, R81, R83
Flowers: R81, R83, R32, R30, BV00, BV34, YG13, YG17, BG00, BG01
Kraft Cardstock - Card Base
Instructions:
1. Stamp the teacup image 3 times onto a piece of copic friendly card using black memento ink.

2. Using the coordinating die set, place a piece of washi tape to secure the die down before running this through your die cutting machine. Stamp and die cut another two cups, trim the bottom of the cups off.

3. Using the above copic markers colours, colour in all images. Die cut a piece of pink card and a piece of pattern paper included in the kit using the rectangle die set. Attach the pattern piece of paper to the pink piece of cardstock using double sided tape.

4. Adhere all the pieces including your sentiment on your card using foam dots.
