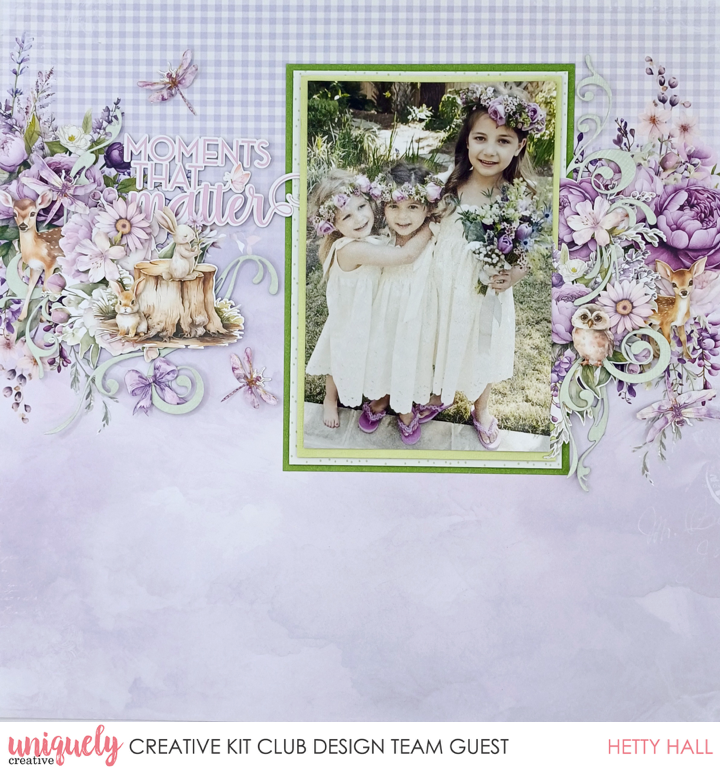
MOMENTS THAT MATTER LAYOUT - HETTY HALL

Welcome to our February Collection - Serenity!
To recreate this great layout created by Design Team member Hetty Hall you will need the products listed below:
Uniquely Creative Products Used:
UCP2870 Harmony Paper
UCP2873 Serenity Paper
UCP2871 Serene Paper
UCP2894 Serenity Creative Cuts
UCD2178 Slim Lace Frame & Flourishes
Light Green Cardstock
Dark Green Cardstock
Other Products Used:
Foam tape/dots
Double sided tape/hot glue
Photo Size: 6” x 4”
Instructions:
1. Step 1:
Cut three photo mats, light green cardstock 6 ¼” x 4 ¼”, Serenity paper 6 ½” x 4 ½”, dark green cardstock 6 ¾” x 4 ¾”. So every piece is cut ¼” larger each time. – See image 1

Step 2:
Layer all photo mats on top of each other starting with the smallest one, add photo on top using foam tape/dots. (Make sure to stay away from the edges to leave room for embellishments). – See image 2
Step 3:
Place photo on top of Harmony paper, approximately 1” from the top and 2 ½” from the right, adhere with double sided tape. – See image 3
Step 4:
Die Cut Slim Lace Flourishes from Serene paper – See image 4
Step 5:
Layer the die cuts from the Serenity Creative Cuts around your photo using foam dots for dimension (below the die cuts used) – See image 5
Step 6:
Add the die cut flourishes also, tucking them in between the other die cuts using hot glue, shape and bend them where needed. – See image 6 and 7

Sue RAMAGE
February 13, 2025
I was thrilled to see the layouts by Hetty Hall. I love her style. It was because of her layouts that I started subscribing to uniquely creative. Would love to see more of her work throughout the year. I appreciate all the design team, they do a great job. Was so good though to see Hetty and Michelle Van Oudfshoorn’s designs this month.
Appreciate you all,
Thanks Sue