OH MY SWEET THING LAYOUT TUTORIAL - JACQUIE HAY

To recreate this beautiful layout created by Design Team member Jacquie Hay you can follow the steps below:
Uniquely Creative Products Used:
· UCP3142 Oh My Goodness Paper
· UCP3144 Oh Lovely Paper
· UCP3145 Oh My Darling Paper
· UCP3148 Creative Cuts
· UCE1728 Iridescent Pearls
· UCE1803 Foam Mounts Squares & Strips
· UCE1859 6mm Double Sided Tape
· UCE1872 Fussy Cutting Scissors
· UCE1981 Die Release Tool
· UCE1986 Edge Distressing Tool
· UCE2192 Paper Perfect Quick Dry Glue
· UCE2194 Paper Perfect Trimmer
Other Products Used:
· Embroidery Thread
· White Cardstock
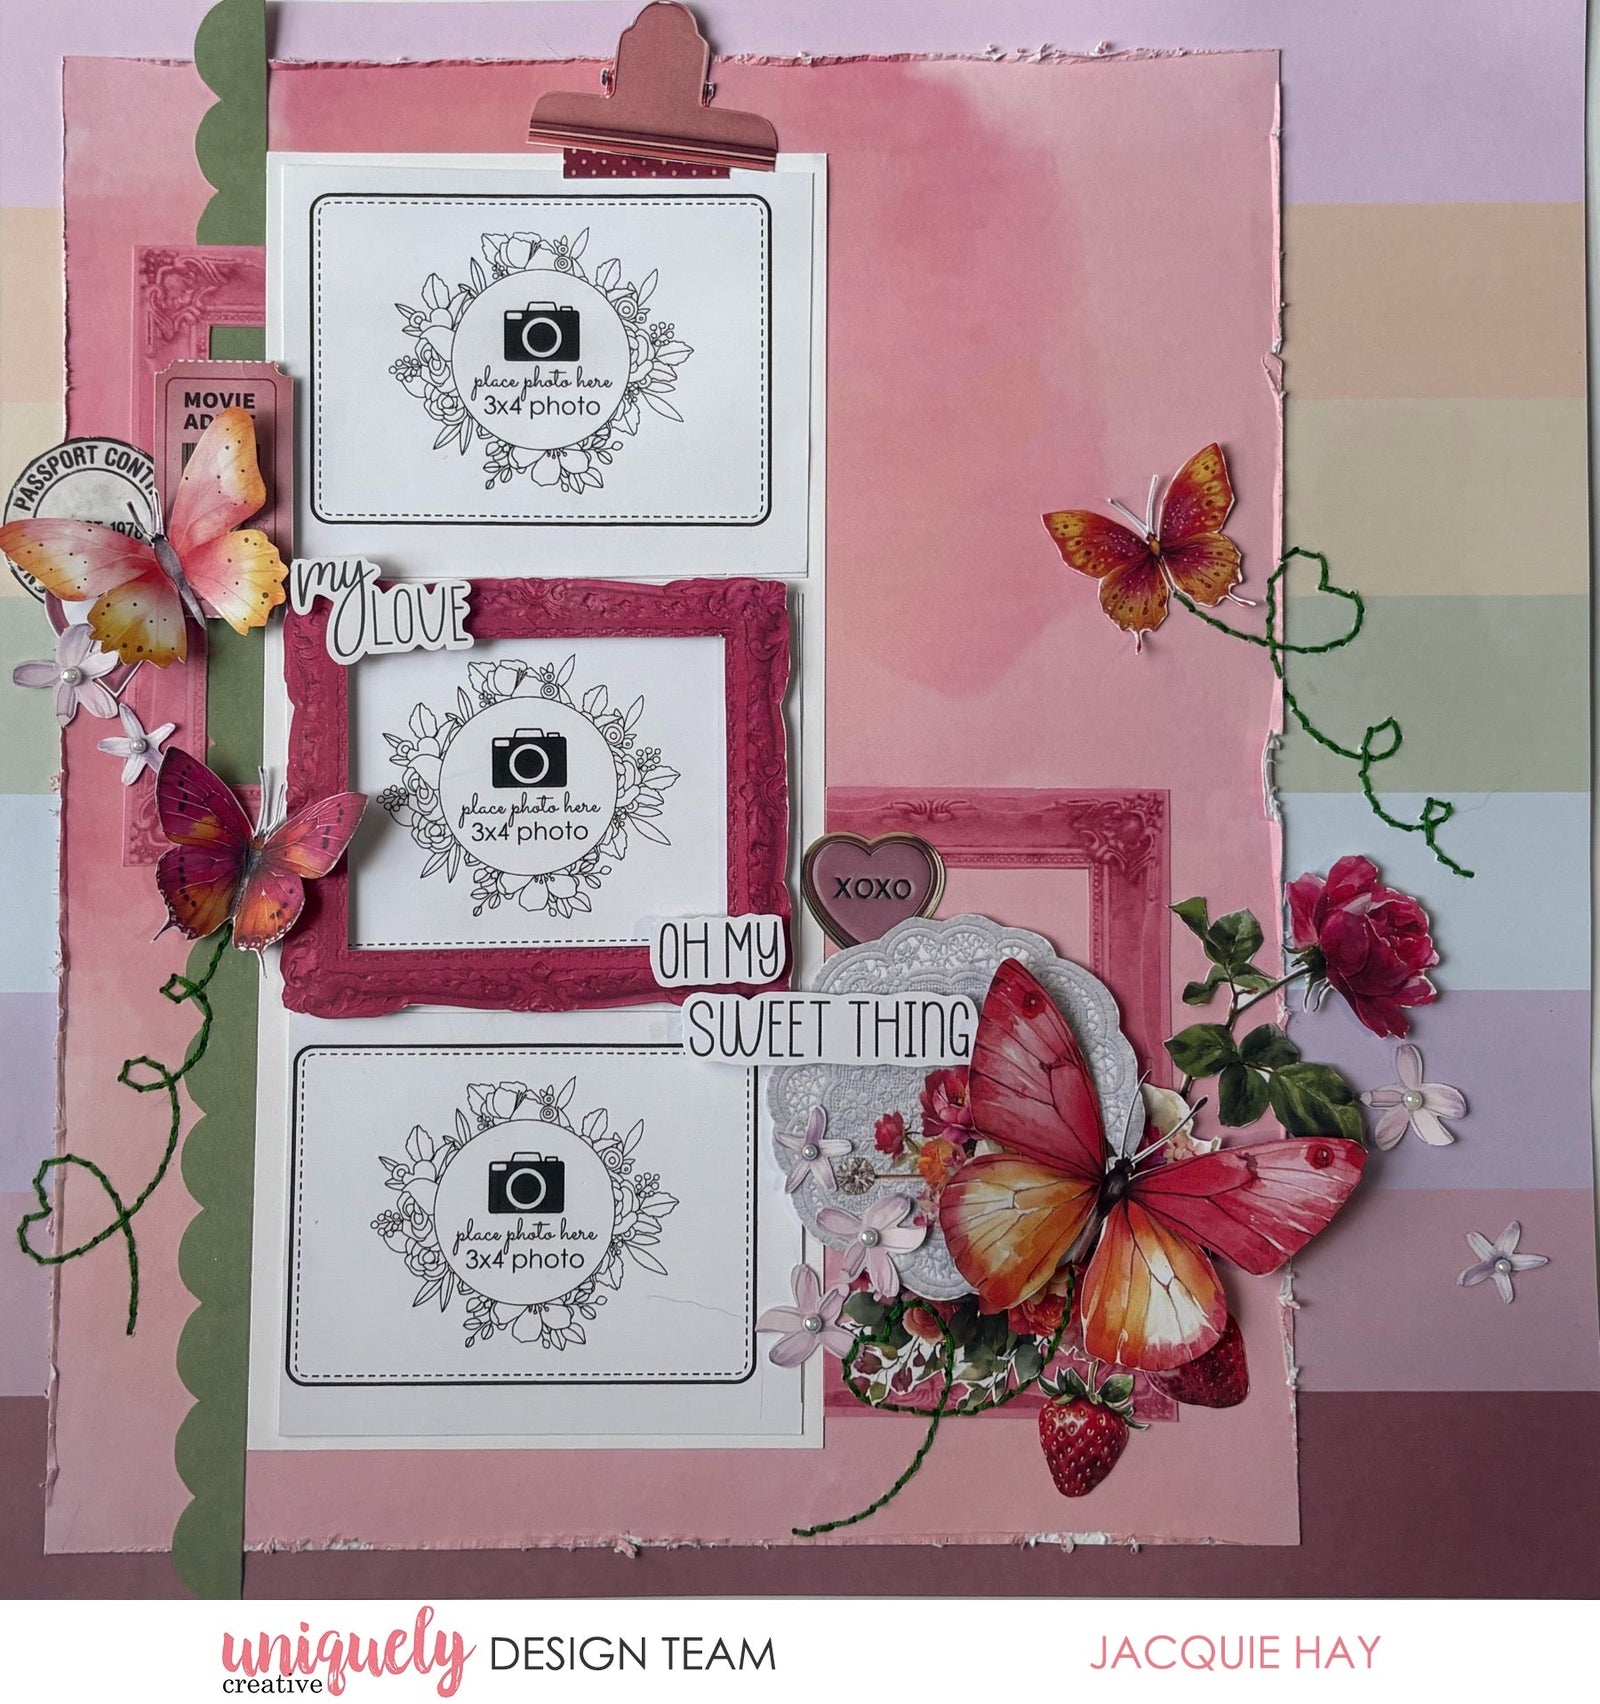
Photo size: (three) 3"x4" landscape
Step 1:
Cut the branding strip form a sheet of Oh My Goodness paper. Then cut 2 ¾” from the right side and ¾” from the bottom edge – See image 1.
Step 2:
Distress the edge of the main piece cut from Oh My Goodness paper using the Edge Distressing Tool.
Step 3:
Adhere to a sheet of Oh Lovely paper on the left side – See image 2.
Step 4:
Cut a piece of White Cardstock to 4 ¼” x 9 ¾” to mat your photos.
Step 5:
Fussy cut pieces from the Oh My Darling paper – See image 3.
Step 6:
Adhere the photo mat 2” from the left and 1 ¼” down from the top.
Embellish with the fussy cut pieces from Oh My Darling paper and Creative Cuts, using Foam Mounts, as well as Iridescent Pearls. You may also like to add some stitching – See image 4.