Santa's Workshop Slimline Card Tutorial - Vicki Poulton
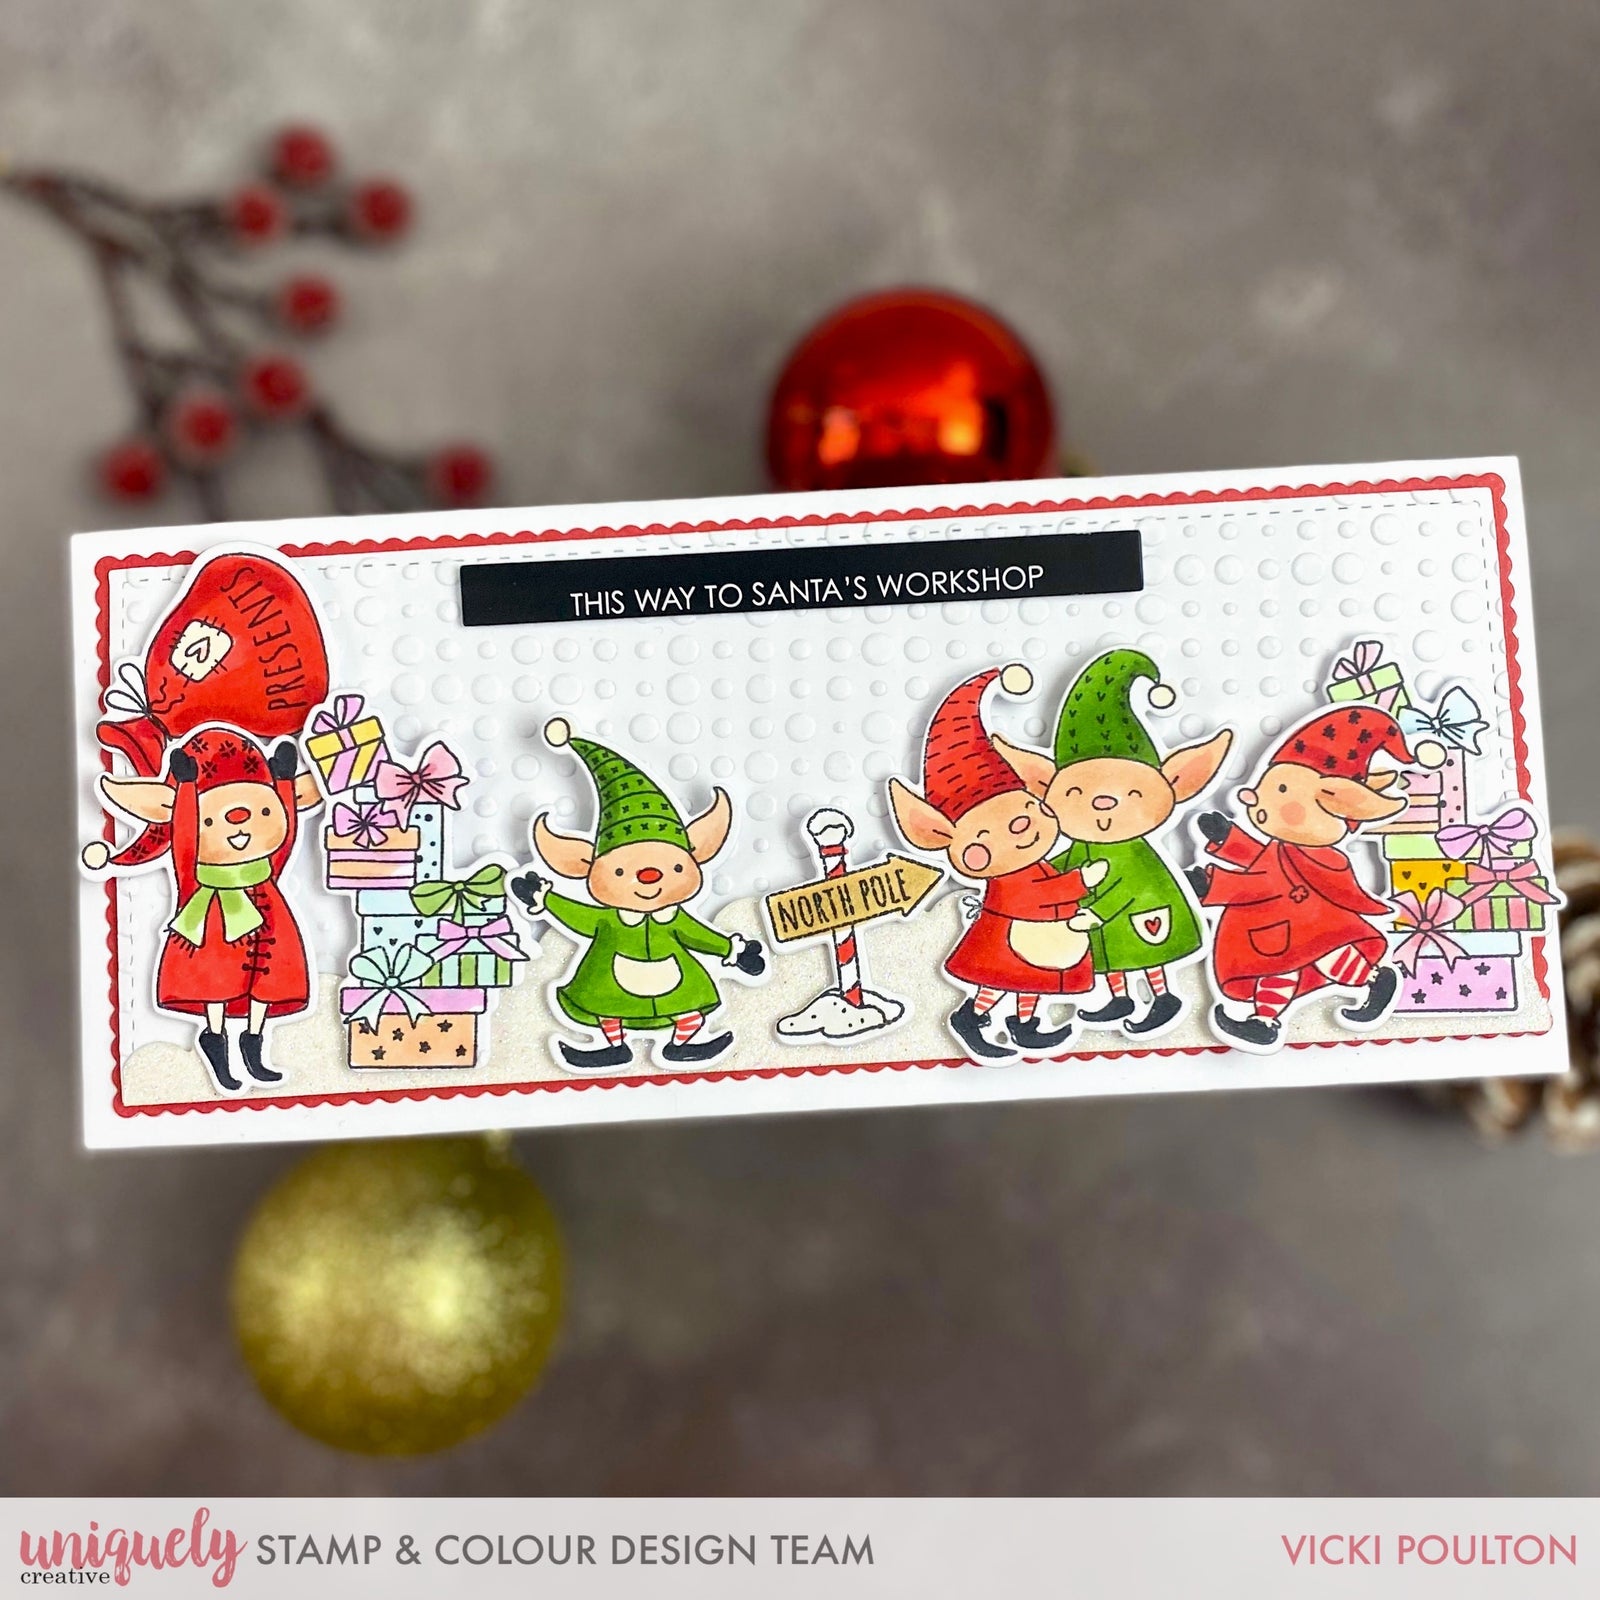

With Christmas drawing closer, Uniquely Creative has more inspiration for you using the Elf Christmas collection to create gorgeous cards. Vicki Poulton has created a lovely slimline card using these gorgeous stamped images. See below for all of the colours, products and full tutorial for you to create your own Christmas card!
Uniquely Creative Products Used:
- UC1881 Elf Christmas Stamp Set
- UCD2077 Elf Christmas Die
- UC1882 Elf Hugs Stamp Set
- UCD2078 Elf Hugs Die
- Inspiring Slimline Embossing Folder
- Elf Christmas Mini Cut-a-Part Sheet
- Cut-a-Part Essentials #5 Die
- Slim Stitched Nested Rectangle Die
- Slim Stitched Scalloped Nesting Die
- Slim Fancy Borders Die
- 12x12 Brick Wall Cardstock
- Elf Faces - E11, E13, R20, R22
- Reds - R24, R29, R81, R85
- Grey - C0, C6, C8
- Green - YG17, Yg67, G82
- Blue - BG000
- Purple - V15, V17
Card Size: 9cm x 21cm (UC Slimline Card)
Instructions:
1. Die cut a white piece of card using the Slim Stitched Nesting Rectangle die.

2. Using Brick Wall cardstock, die cut a scalloped rectangle using the Slim Scalloped Nesting Rectangle die.

3. Place the white stitched rectangle in the Inspiring Slimline Embossing Folder and run through your die cutting machine to create a gorgeous textured effect.

4. Stamp out the images and colour with the colouring medium of your choice. Die cut the images using the coordinating dies.

5. Die cut a scallop edge from white glitter card with the Slim Fancy Borders die.

6. Assemble the card by adhering the scalloped red cardstock onto the slimline card base. Using foam mounts, attach the embossed rectangle piece and add the scalloped edge to the bottom of the card. Die cut the sentiment from the Cut-a-Part Sheet and attached to the card. Finish the card by adding the images along the bottom.
We hope you enjoyed this tutorial today!
Theresa Leask
December 13, 2022
love them