You Are Wonderful Tutorial - Natalie Elphinstone

Uniquely Creative Products Used:
UCMM1749 Diamond Fade Stencil,UCL1720 Gorgeous Girl Laser Cut, Patterned Paper From The Gorgeous Girl Kit, UC1799 Kookaburra Party Stamps, UCD1903 Kookaburra Party Die Set, UCD1974 Stitched Nesting Rectangle Dies, UCD1975 Scalloped Nesting Rectangle Dies, UCE1831 Watercolour Paper, UCE1772 Uniqolour Markers, UCE1778 Blending Brush, UCE1803 Foam Squares, UCE1750 Champagne Rhinestones
Other Products Used:
Distress Oxide Ink, Sizzix Expand Paste
Instructions:
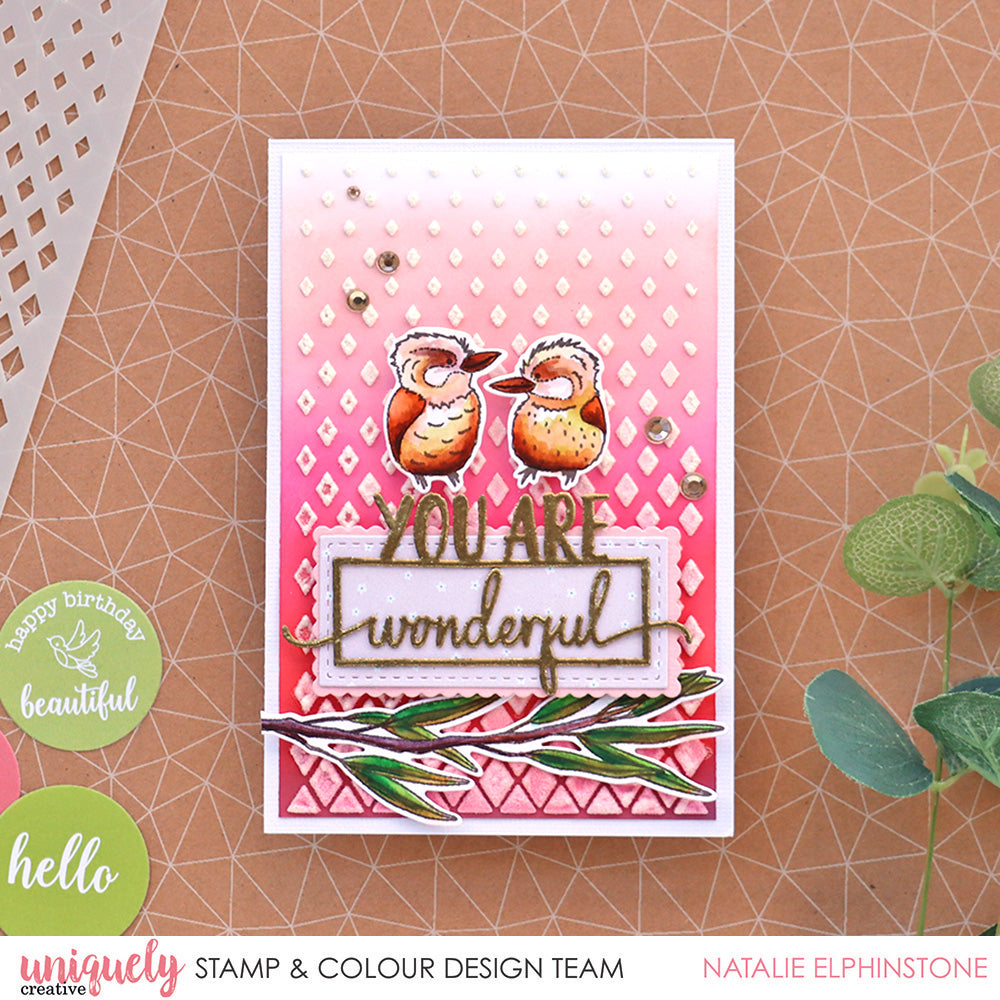
1. Make a background panel by blending a variety of Distress Oxide ink colours with your Uniquely Creative stencil brushes. Natalie decided to go from a dark purple all the way up to a light pink and even leaving the top white.

2. Spread the Expand Paste by Sizzix through the stencil with a palette knife. It goes on thick like butter, and looks almost translucent. When you gently heat it with a heat gun it turns white and expands – just like the old-fashioned puff paint. This adds a really nice depth and texture, and you can control that by how much heat you add – making it either really fluffy, or just a little bit.

3. Time to stamp and colour those little baby kookaburras, as well as the long branch from the Kookaburra Party stamp set. Use a permanent ink to stamp onto Uniquely Creative watercolour paper, and then colour with Uniqolor markers. When they’re dry, cut them out with the matching dies.

4. The sentiment is created by layering up two pieces cut with the Scalloped and Stitched Nesting rectangle dies, and then gold-embossing the laser cut “You are Wonderful” from the Gorgeous Girl mini kit.

Assemble everything together on your card, sticking on the images with foam squares for even more dimension, finish off with a sprinkling of champagne rhinestones for a touch of bling.

